 Back
Back
I considered Cycra and Acerbis hand guards but went with Barkbusters simply because they sounded like they were custom fitted for my '07 XCountry (which we'll see later is not so true! :(
Also, if you decide to use one of these common types but want a better mount for the inside mount, consider Bike Bonz hand guard mounts.

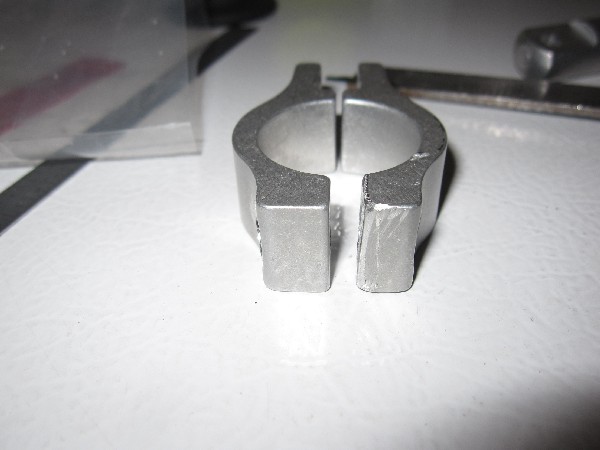
There is 1 main unavoidable problem with the installation that has to be addressed: That the handlebars are tapered right where the inner bar mounts have to be clamped, and the style of these clamps would prevent them from fitting tightly onto the handlebars.
This is true for the '07 handlebars, but the '09 seems to have different bars that do not taper in this area I believe.
(UPDATE: Later I have found that Cycra Racing makes a U-clamp specifically for Magura tapered bars that might just work and avoid this taper issue.
I didn't try them but you can see the Cycra Magura U-clamp 1153-02 for yourself).
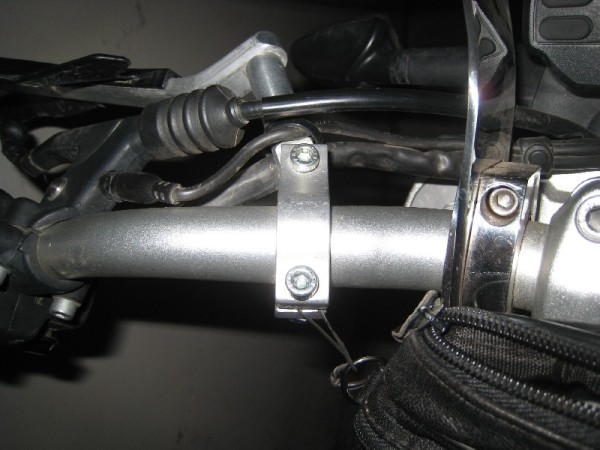
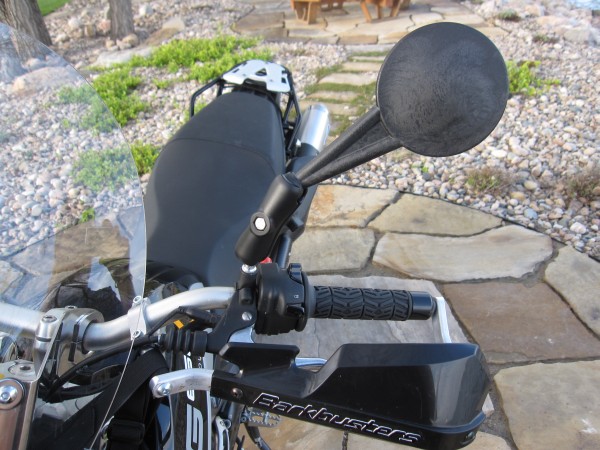
Here is a picture of the completed installation, that shows the handlebars tapering, on the left side.
A 2nd consideration: I really wanted to install them in a way where I could keep the OEM weighted bar ends as well, and I was told the Barkbusters would allow this.
As it turned out there is a definite tradeoff:
...If you want to keep the weighted bar ends, this causes the guards to be farther out towards the end of the bar, which causes the inner bar clamp mount to have less clearance to the brake reservoir, on the right handlebar side. The potential problem is that if a crash occurred and the hand guards rotated, they could take out the brake reservoir possibly.
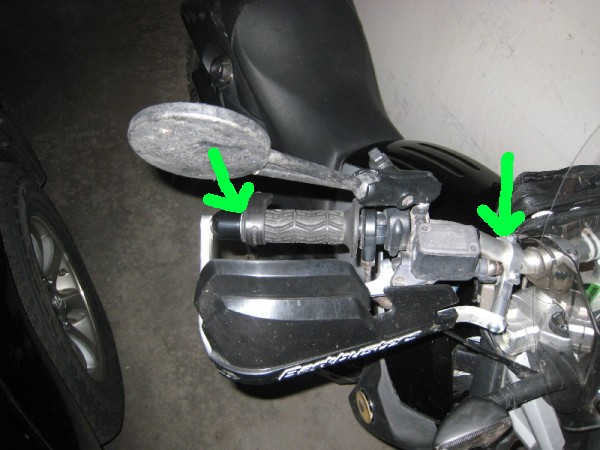
Also, this is a good time to install new grips if you want. I really don't like the OEM ones and installed some comfy gel ones, the Pro Grip 737. I also used a tube of Scott's grip glue, but only on the left side as the right throttle side doesn't really need it and it is too risky to maybe get some excess glue binding the throttle up.
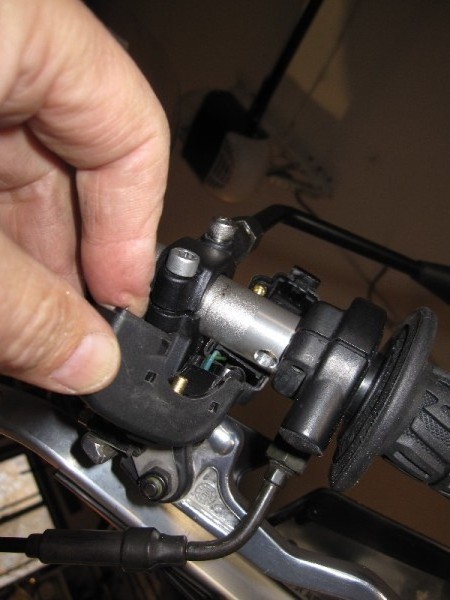
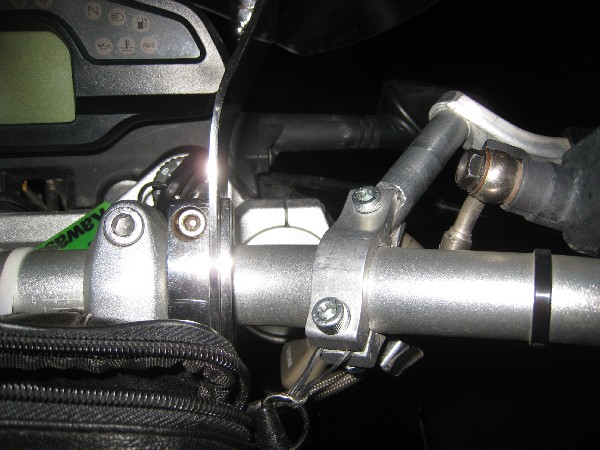
Here's an overview of the 2 mounting areas that will require custom work described below:
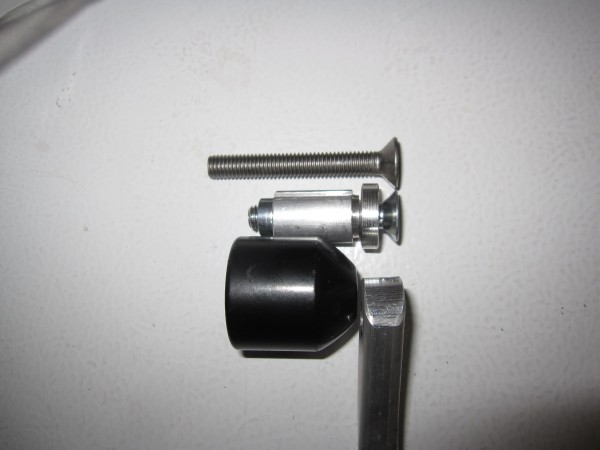
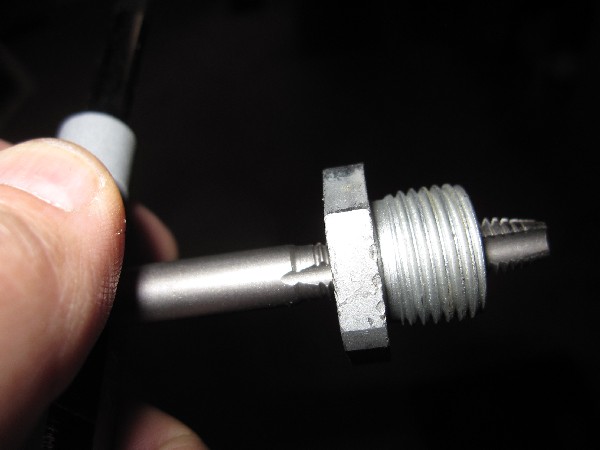
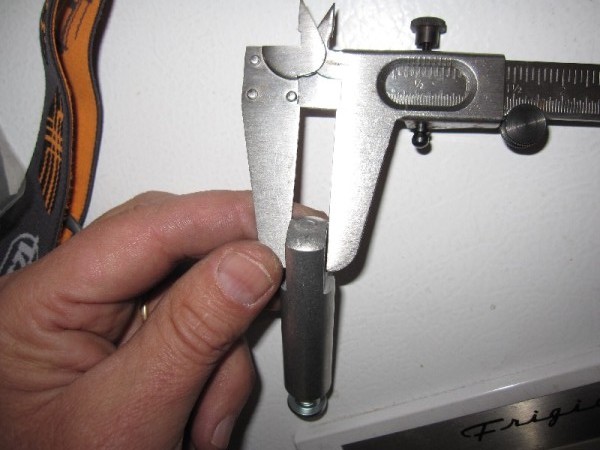
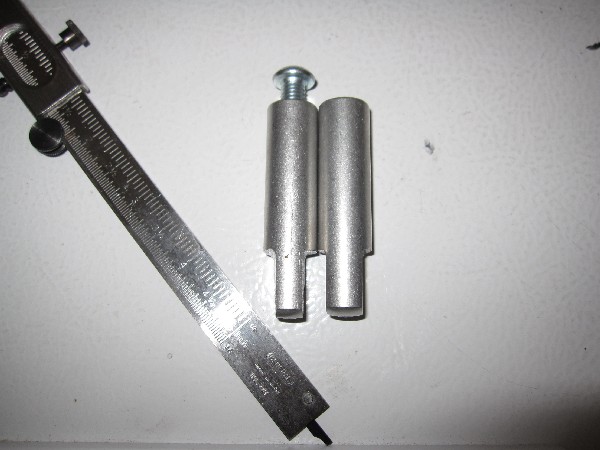
Get 2 longer 8mm stainless flathead bolts, this pic compares them to the discarded one that was provided by BB:
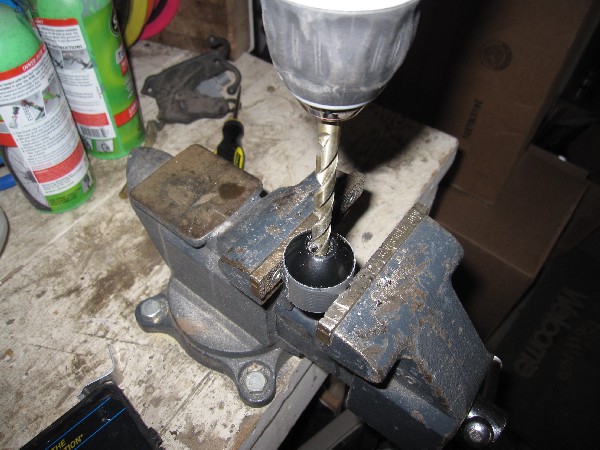
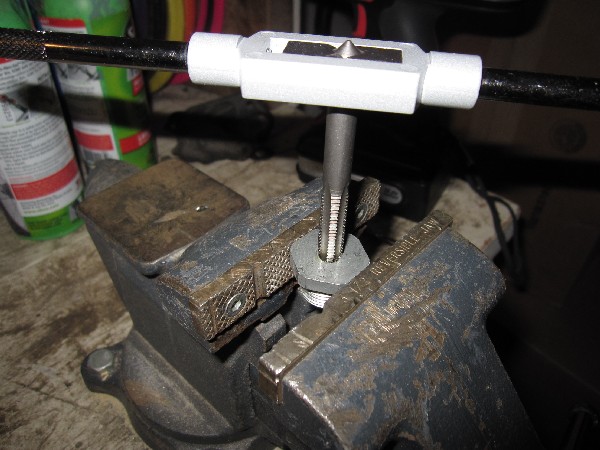
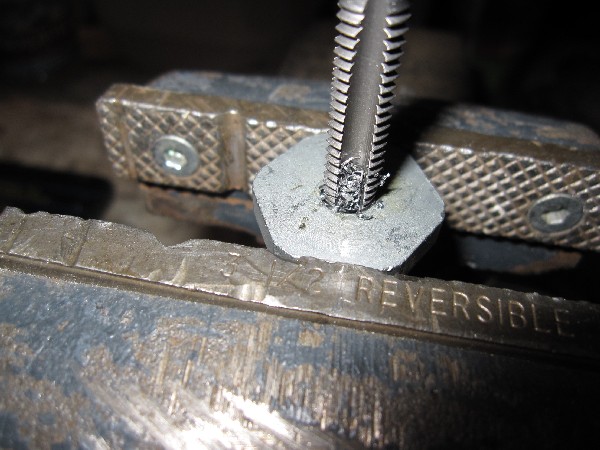
Drill the weighted bar ends out large enough to clear the 8mm bolts.
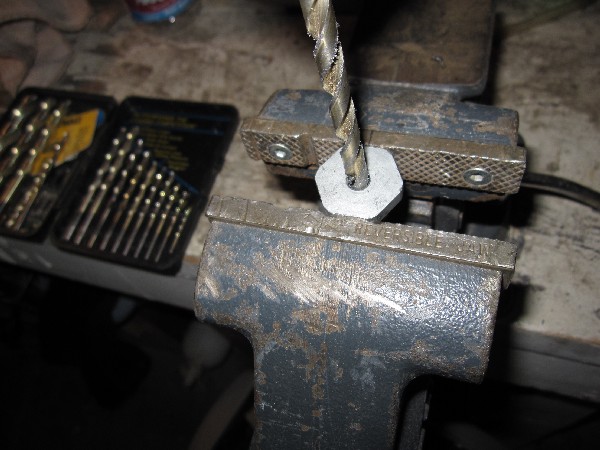
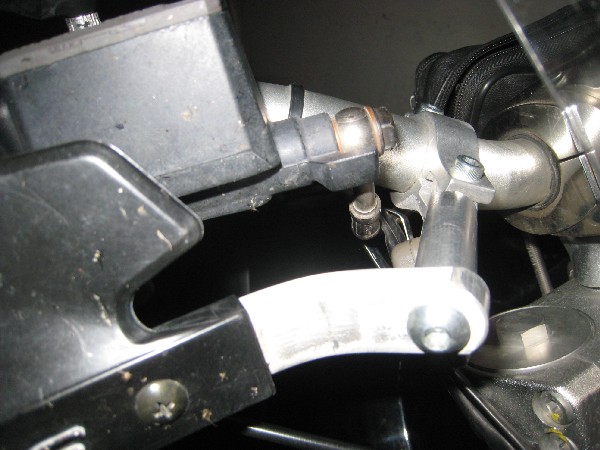
On the throttle side, to maximize the clearance between the hand guard bar and the front brake reservoir, I did 2 things:
-I bent the bar to move the inner mount farther inward.
-I moved the throttle farther out so I could move the brake fluid reservoir farther out. In order to move the throttle I had to enlarge the hole that the throttle body pin slides into.
This can cause the throttle cable to be stretched to its max, so I had to adjust the cable near the airbox to get a little extra length.
Now attach the hand guard on the outer end of the handlebar loosely, and proceed to the next step.
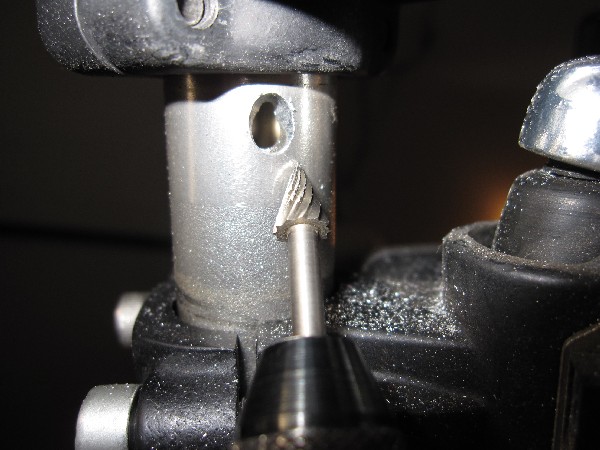
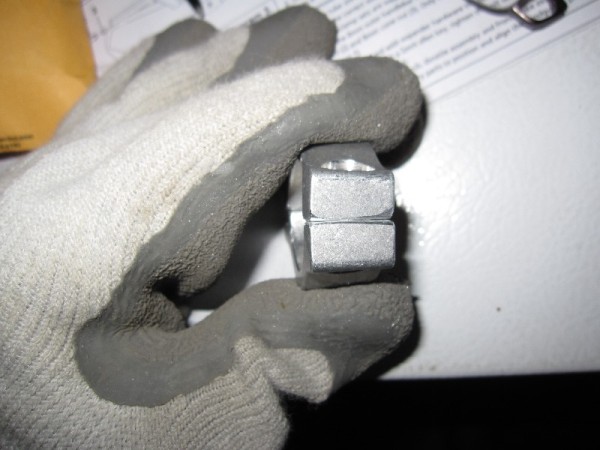
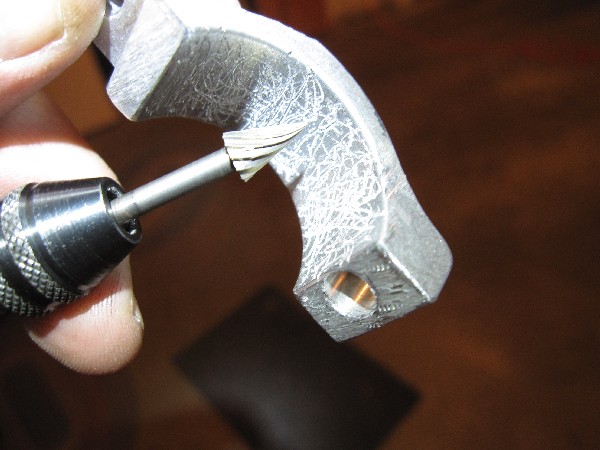
First I had to grind the mount extensions because they were too thick and also needed to be tapered to match the bars.
Then the bar clamps were ground to match the handlebar taper. Then I also used a Dremel tool to rough up the inside of the bar clamp so it would grip the bar better.
At this point, re-install every bolt with blue thread lock compound and torque tightly.
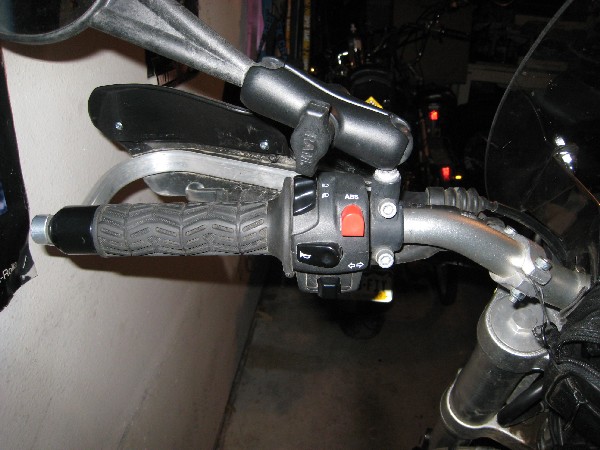
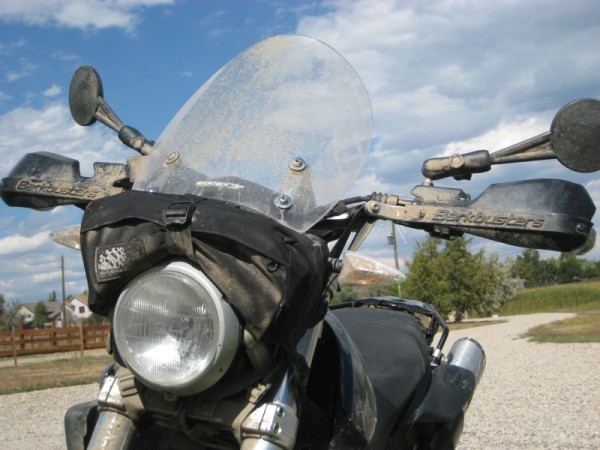
Some final pics of the installation. Clearances around the right side brake fluid reservoir.
The final look, shown with the optional extra height plastic installed for more coverage:
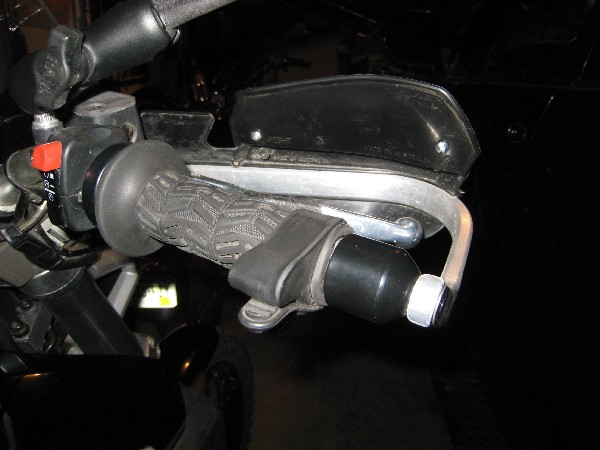
Also shown is the Kuryakyn Throttle Boss, simple and small, stretchy rubber easy to rotate and adjust position, quick to remove for offroad - and wrap onto handlebar for storage. Really helps reduce the stress on the right arm. It is small enough I've used it off road unless really hairy trails, and still feel safe.

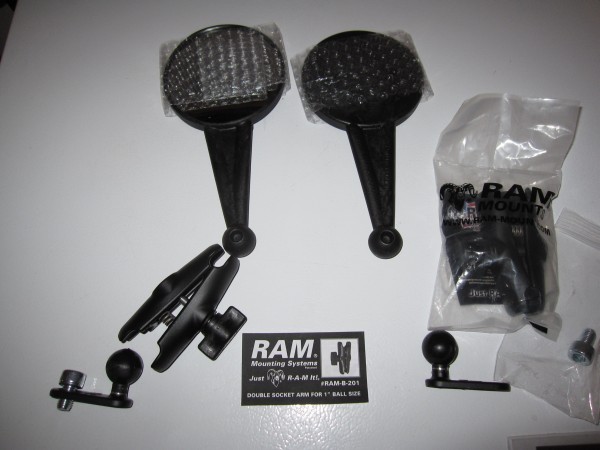
Above was the first package I received but I didn't use the RAM offset mount shown, as it turns out the BMW perch mounts accept the standard 10mm x 1.25 thread pitch, which allows you to use the standard
RAM-B-349U ball mount with stud from GPSCity.com
The only issue with this ball mount is the shaft is made of soft aluminum so to tighten it they say to clamp on the mirror and twist but I didn't find that was tight enough so I used needle nose vise grips. This works but does mar up the aluminum a bit - no biggie!
There are 2 arm lengths available, the short 2" arm RAM-B-201U-A, and the longer 3" arm RAM-B-201U. I selected the longer arm but I think the shorter one would still be long enough yet look a little better!
Here is a picture with it set more vertical, that's what is great - you can adjust them any way you want!
Back