 Back
Back
 (Also, here are pics from RV8Pilot).
I had an opportunity to buy a used Rekluse z-Start Pro clutch from an AdvRider (who had it on an XChallenge) at a very low price so I thought I would try it out.
This is a fairly involved mod, involving a 100 ft-lb torque wrench and/or air impact wrench, and for me it took several hours with a few issues that took time to resolve. Of course you have THIS to guide you so it should go faster!
Rekluse calls it an "automatic" clutch because it automatically disengages when the engine is at idle or off. When the throttle is applied and engine speed increases above an idle, the Rekluse clutch becomes engaged automatically as the balls fly outward up the sloped ramps.
Think of it as a 2nd clutch that is in series with the normal clutch plates - meaning that BOTH have to be engaged to engage the tranny to the engine.
I still use the clutch lever all the time to shift (supposedly not needed if not under heavy clutch load). Also it feels a little different when starting off from a full stop. For this reason I don't really care for it for riding around town starting from a full stop.
As the previous owner told me, some bikes work better than others and the G650X is not the best fit for this - perhaps something to do with engine RPMs, friction plate compound, and/or oil used.
The type of oil used is very important. I have asked Rekluse for a recommendation and they did say that Shell Rotella seems to work well.
This does not necessarily rule out synthetic but they more or less didn't recommend it.
(UPDATE: It's been almost 4 years now and I only use the very common Shell Rotella T Triple Protection 15w40 oil, it meets the JASO MA specs for wet motorcycle clutch use. I also found that every 3000 miles it seemed to shift less easily, so I always changed the oil then and it was much better.)
(UPDATE: 8/2014 So... Do I like it? It has saved my butt a couple of times off road so yes I do. I still don't like it when starting from a full stop, just isn't the same. I can live with that.
Mainly for me the advantages are:
** Page 3: **
The Included Parts section indicates 27 of the 7/16" Chrome Steel Ball Bearings which is wrong and should say 9. Note: where it says "RMS" this means Rekluse Motor Sports.
The Required Tools section, note you will need a 27mm socket, snap ring pliers and some kind of impact wrench (I used a cheap air impact wrench).
** Page 4: **
Step 1:
I skipped this step and did not need to disconnect the clutch cable at the perch.
Step 2:
Optional: Rather than lay the bike on its right side, I drained the oil from the oil drain plug and also from the oil tank drain itself into a clean container to reuse it later (I got 80 oz without removing oil filter). In this way I could leave the bike on its kickstand to work on it, and later when I worked on the (very high torque) center clutch nut I was able to put my weight down onto the rear brake to help hold the shaft in place. In the end when you add the ball bearings you will have to lay it down on its side.
Step 3 and 4:
On my bike the shift lever did not interfere so I did not remove it, in fact the left footpeg was in the way of removing the shift lever.
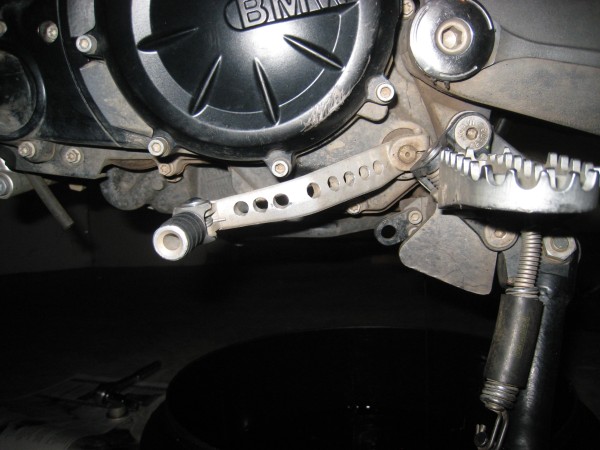
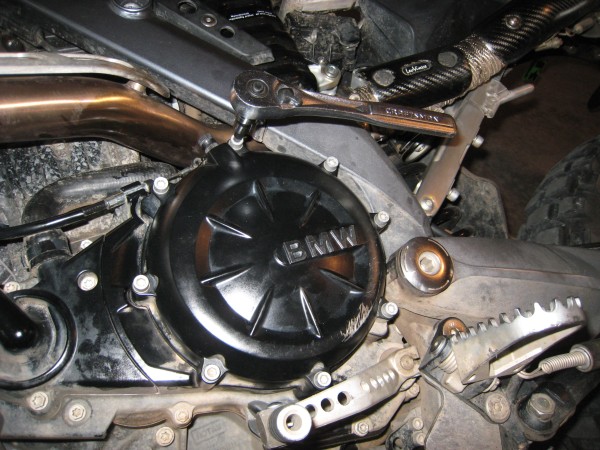
I took note of the original position of the clutch actuator arm before disassembly:
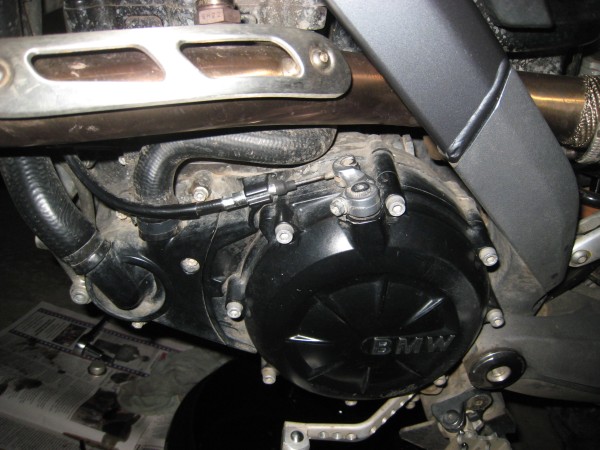
Step 5:
When removing the clutch cover, be sure the gasket stays with the cover. Also you may want to get a new one, but it will probably be reusable. Note angle of teeth portion of throw-out shaft, for later.
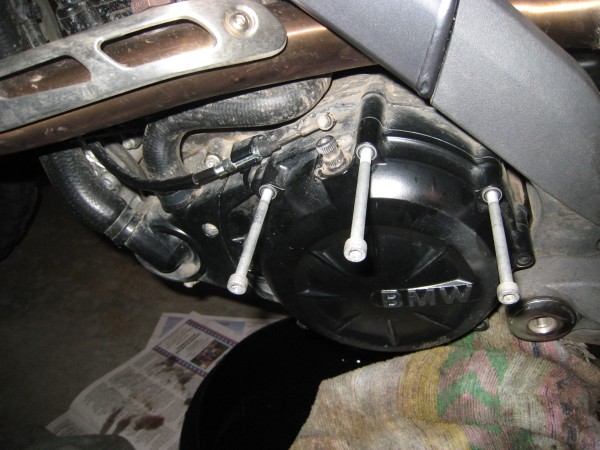
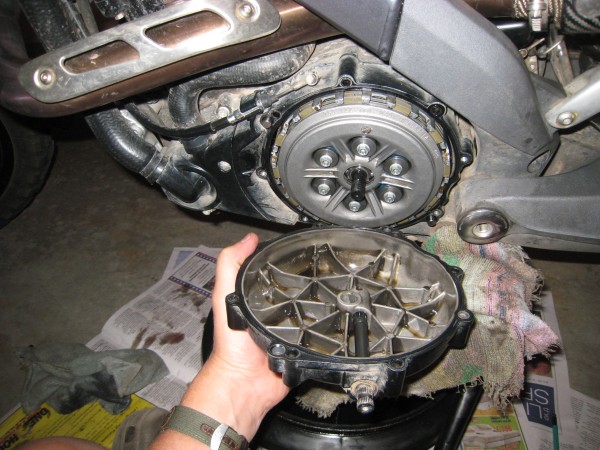
Step 6 and 7:
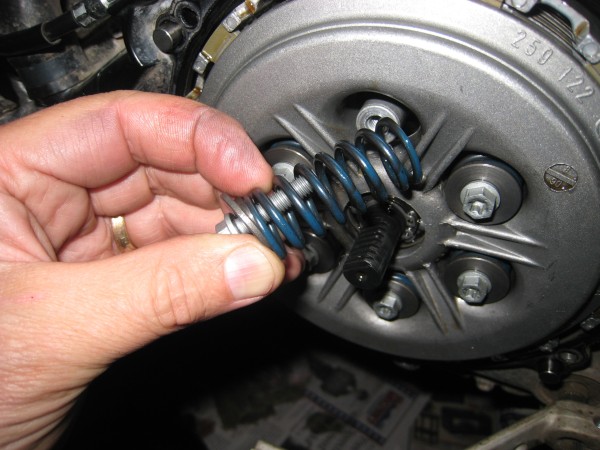
Removing bolts and springs and remove OEM pressure plate containing OEM clutch throw-out:
Step 8:
Optional: I didn't do this step at this time, but left the clutch throw-out intact until step 20 later, just to keep the parts together.
Step 9:
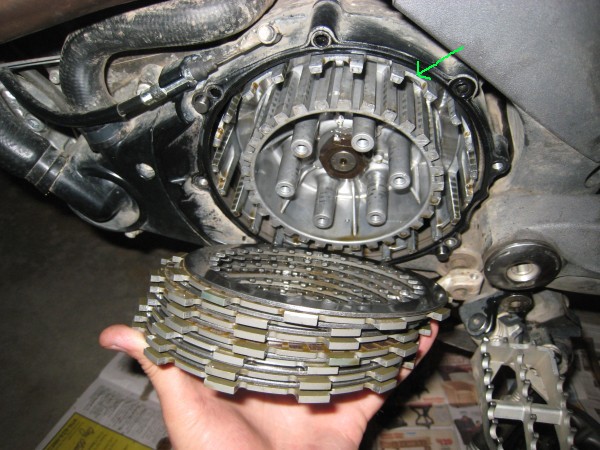
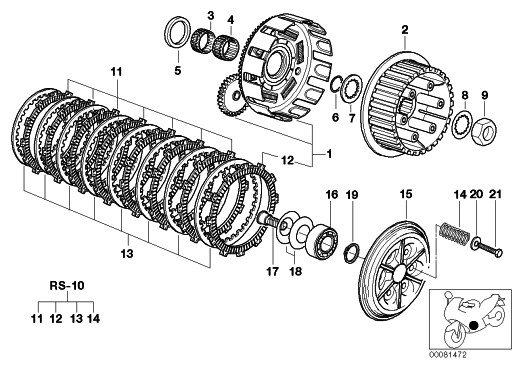
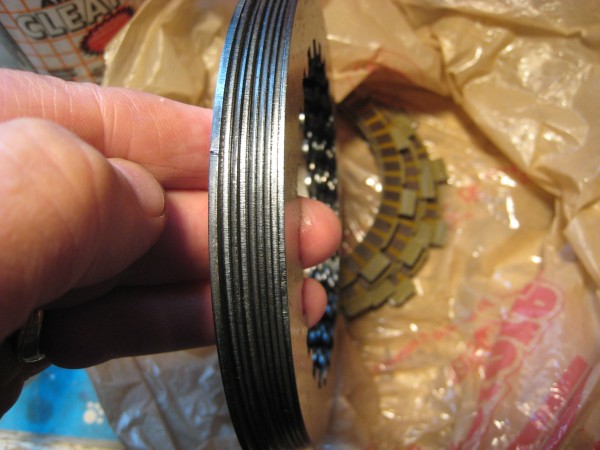
Removing the clutch pack (7 friction disks and 7 steel drive plates). Note that there are only 7 each and NOT 8 each like the BMW micro fiche incorrectly shows:
Step 10:
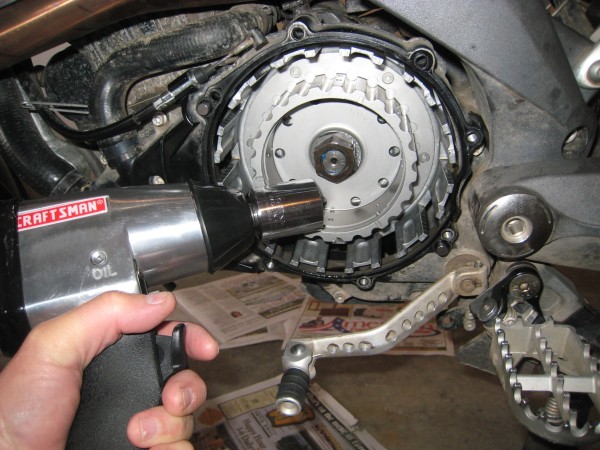
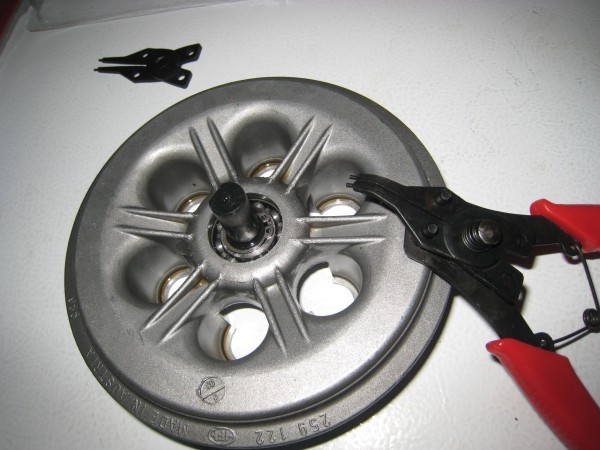
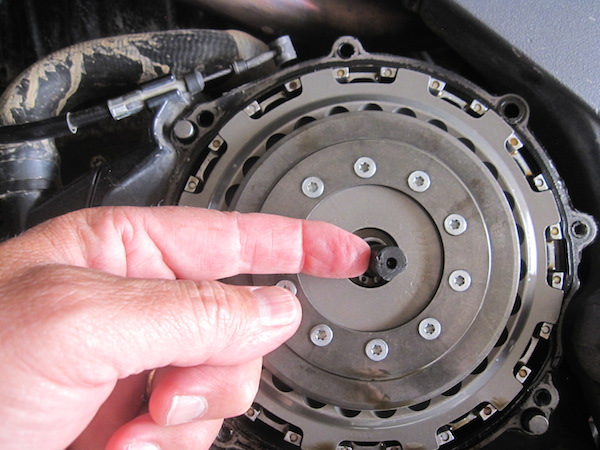
Removing the OEM center clutch hub 27mm nut. This is a bit tricky as I couldn't hold the rear brake enough to free it. I ended up using an air impact wrench to free the nut. Bend the tab back on the lock washer first.
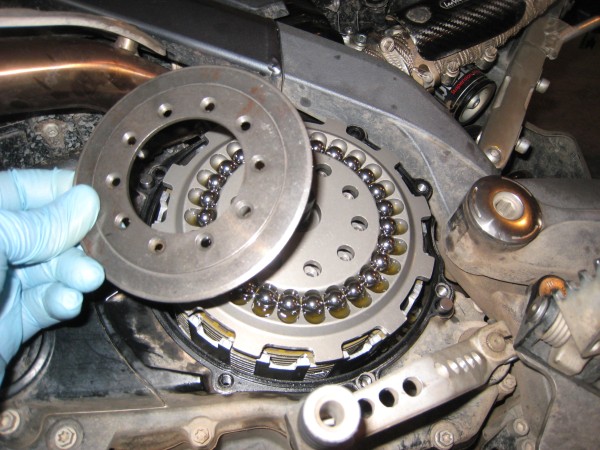
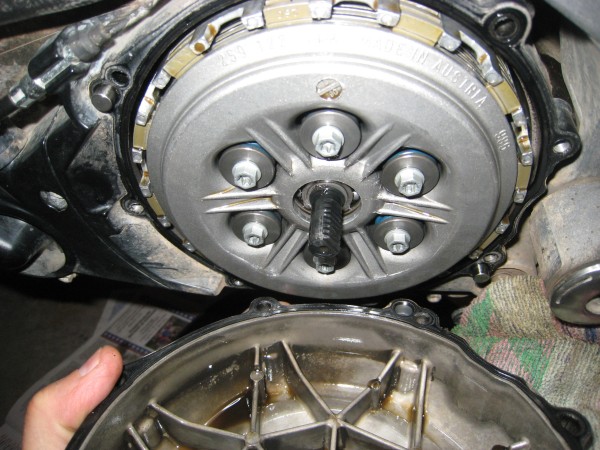
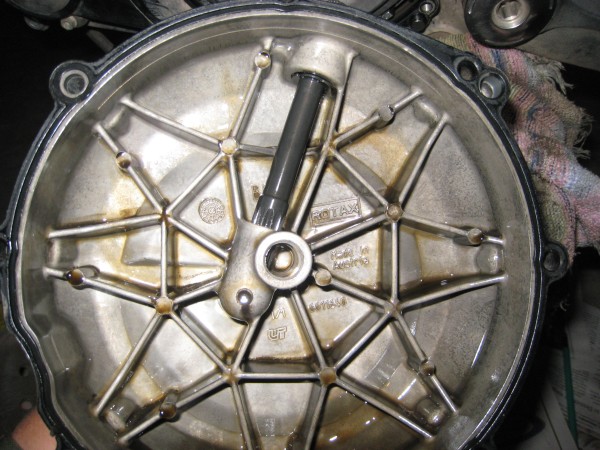
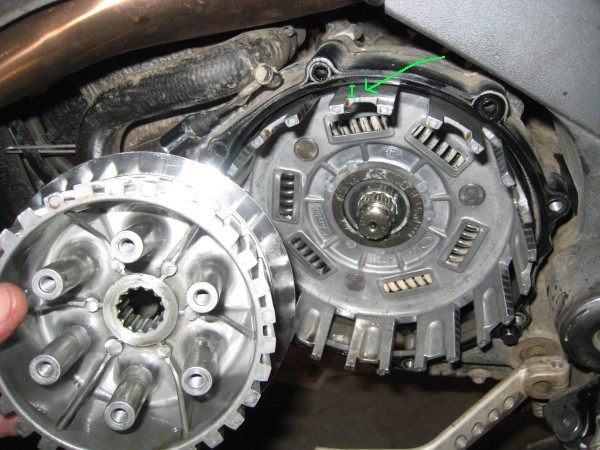
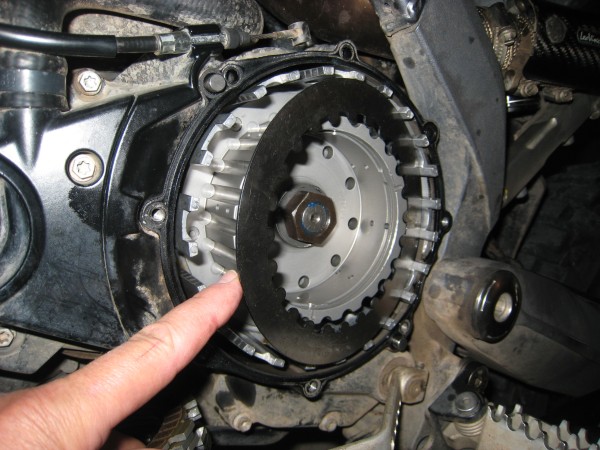
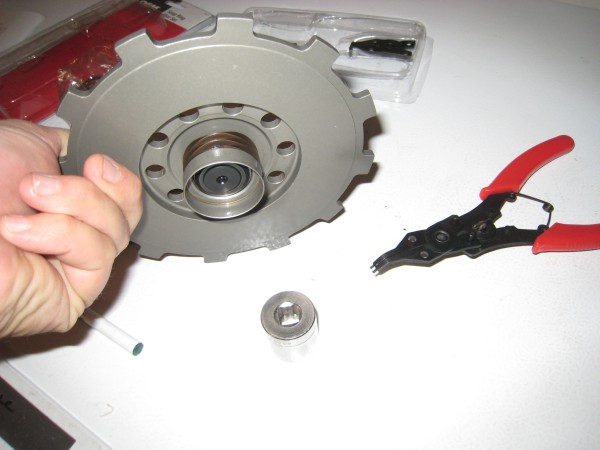
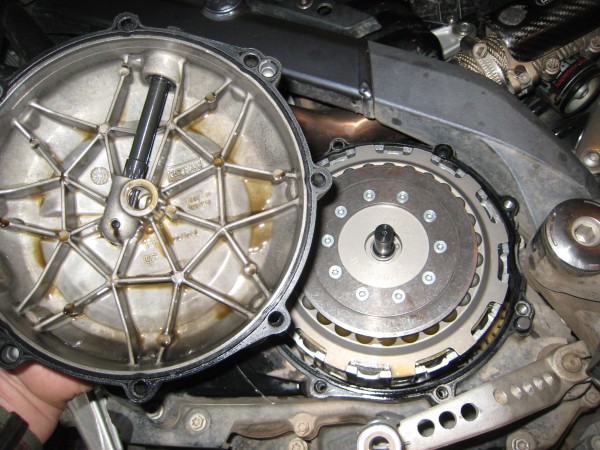
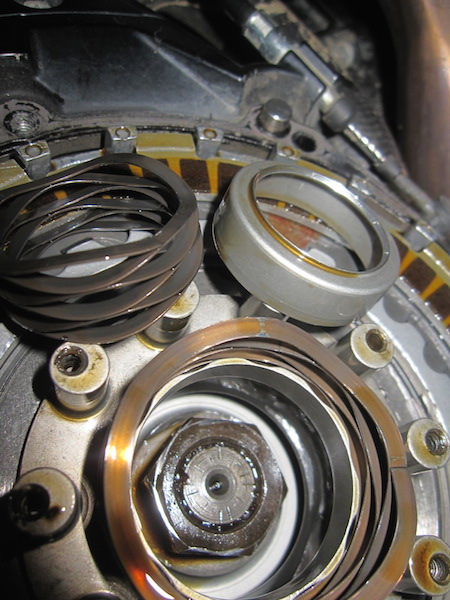
NOTE: When pulling out the OEM center clutch hub, try to keep the outer clutch basket from also coming out - or you will have to shove it back in while you re-engage it into the various gears internally, which can be tricky.


I did it wrong and let the outer clutch basket come out too far. Compare the larger dimension shown in green in this picture to the picture in step 9 earlier. So I had to remove it and study the inner gears to get it to re-insert far enough. Try to avoid this!
Step 11:
No pictures but be sure to read this step and retain the OEM thrust washer as it is probably stuck to the bottom of the OEM hub.
** Page 5: **
Step 12 and 13:
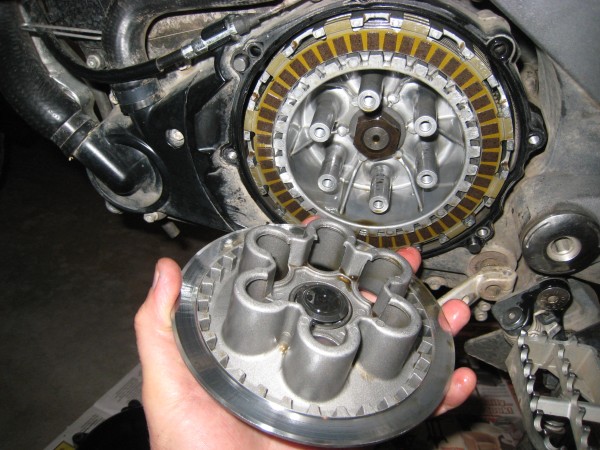
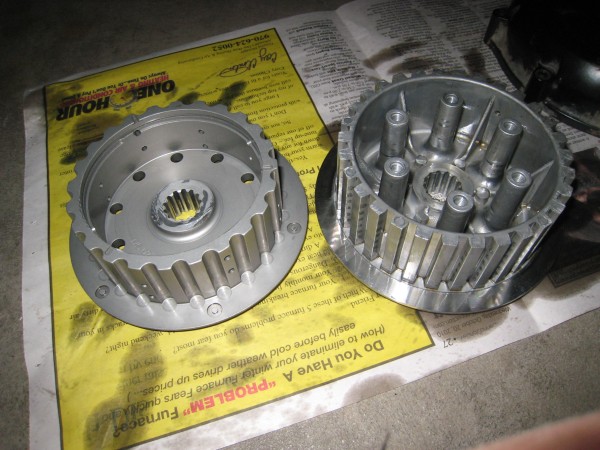
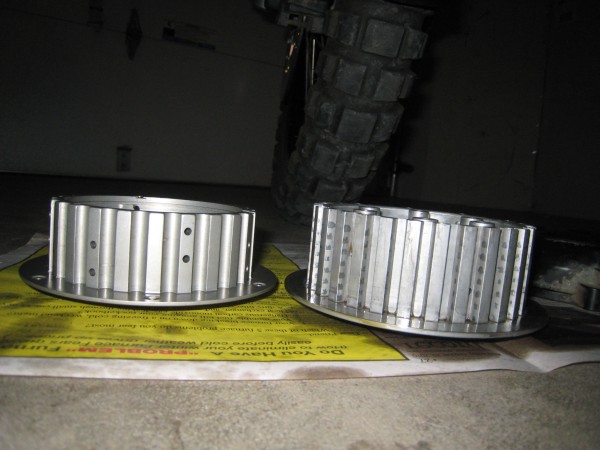
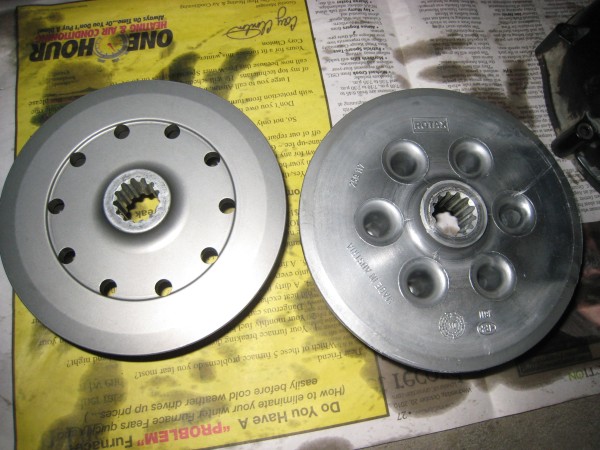
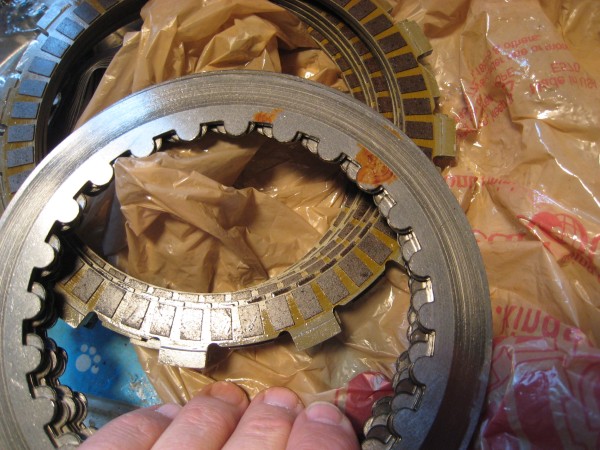
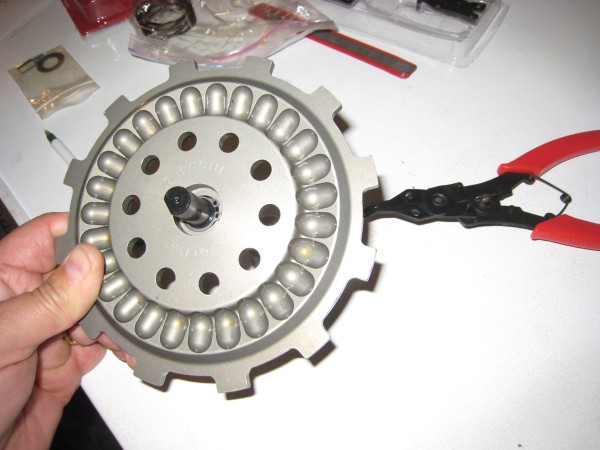
Before installing the Rekluse center clutch, here is just a comparison of the Rekluse (left) and OEM (right) center clutch hubs.
Also note the shape of the tabs are round on the Rekluse vs. square on the OEM (the picture shows one OEM steel drive plate on top of the Rekluse stack):
Step 14:
This step is TROUBLESOME ! The BMW OEM spec is to torque the center clutch nut to 140 Nm (103 ft-lbs). I've been told that normally a BMW shop would have a tool to hold the inner clutch hub in order to torque this properly, but since the Rekluse inner clutch is different it would not fit, so that is not an option.
I had the bike upright on a kickstand but was barely able to hold the rear brake with all my weight enought to get 80 ft-lbs on a torque wrench to click.
I ended up using my air impact wrench as when I used it to remove the nut it was barely even able to do it. Not very accurate but 100 ft-lbs is a lot!
Later, off the record I was told by a couple of guys at Rekluse that even 60 ft-lbs should be enough, but not everyone agrees.
I also used blue loctite 243.
Step 15:
Bend the OEM lock washer tab up against the nut.
Now be sure the tranny is in neutral, and make sure you can spin the center clutch freely and that it does not bind!
Step 16:
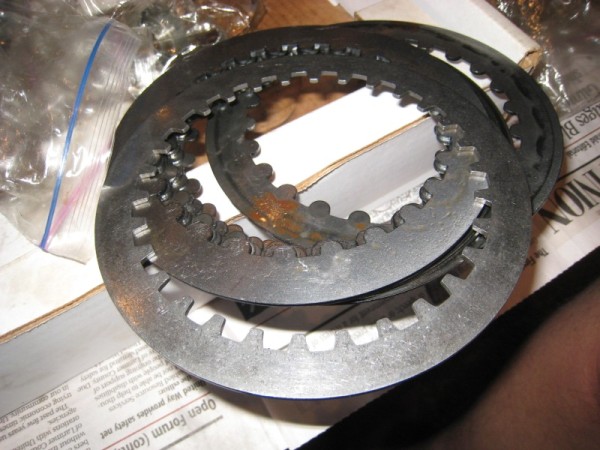
This shows the 8 Rekluse "measured" steel drive plates and the extra thicker one on the left that is 0.065". I received these used, hence the discoloration. Also my clutch friction plates were somewhat used so I ended up using the thicker .065" plate as one of the 8. See later step.
Step 17:
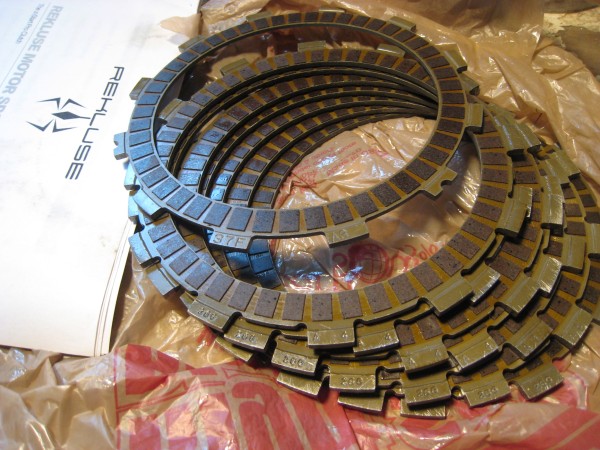
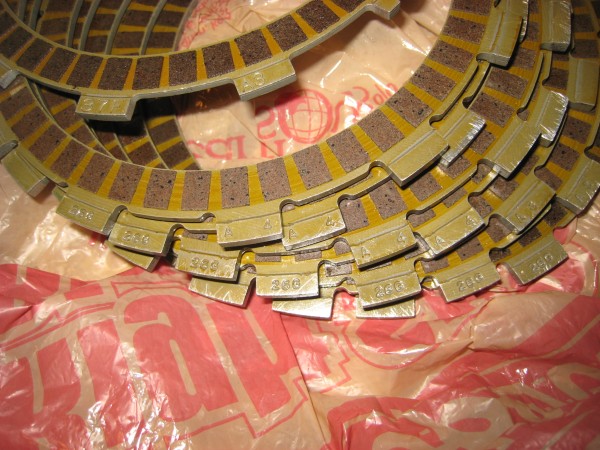
Here are pictures of the one Rekluse Friction Disk shown here stacked on top of the 7 OEM friction disks.
Just a note: the Rekluse Friction Disk was marked as: 37F on one tab and A3 on another. The OEM friction disks had 3 marked 26G A3, and 4 marked 26G A4.
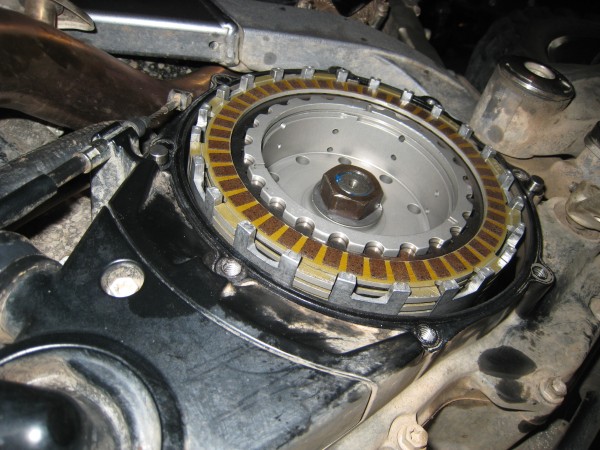
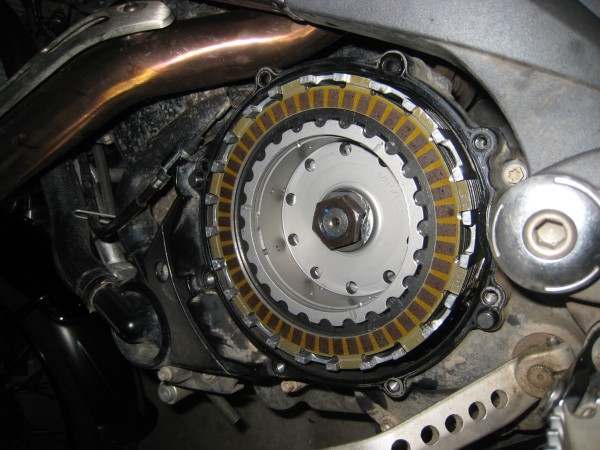
Follow the step 17 directions of inserting first a steel plate then a friction disk, repeat. (The 5th friction disk inserted is the Rekluse one):

** Page 6: **
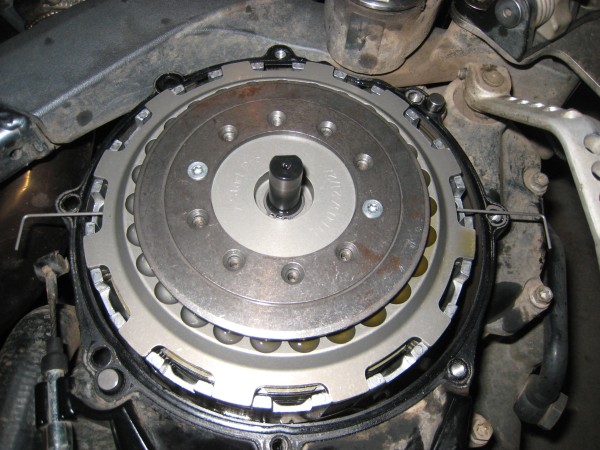
Step 18 and 19:
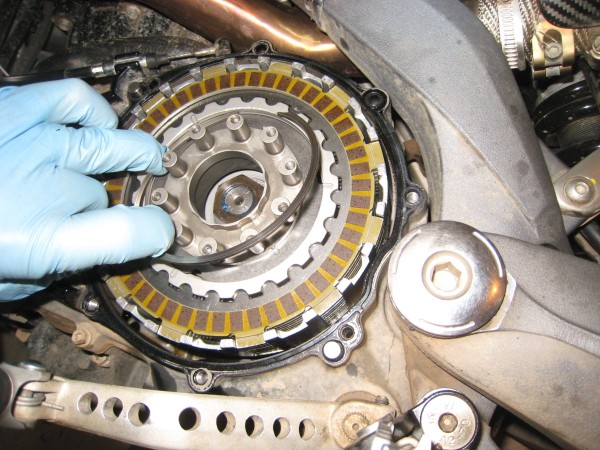
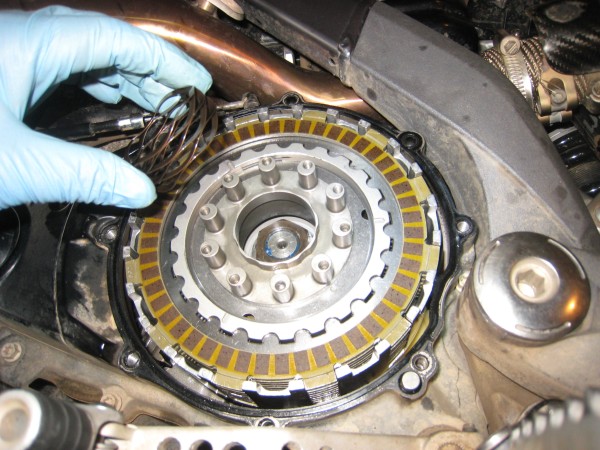
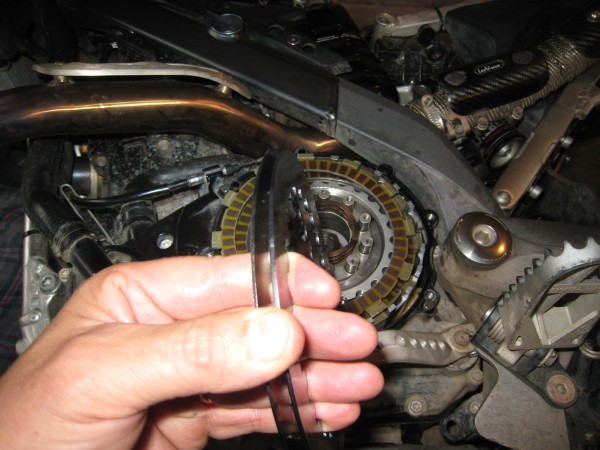
Here's a look at inserting the lower rotating hub assembly and retaining ring:

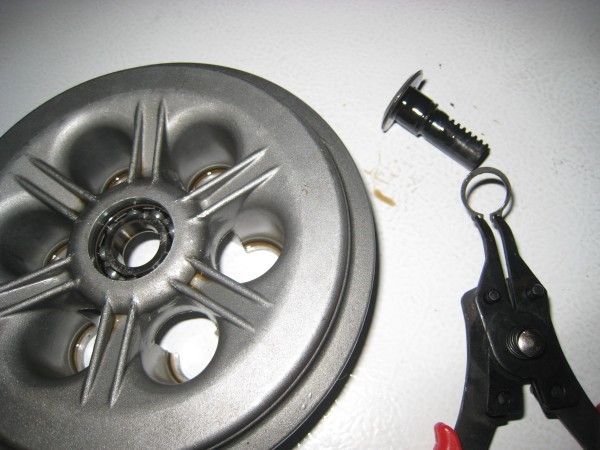
Step 20:
If you skipped step 8 earlier, then do it here first, to remove the OEM clutch throw-out retaining ring from the OEM pressure plate with snap ring pliers. The OEM bearing will remain in the OEM pressure plate as shown here.

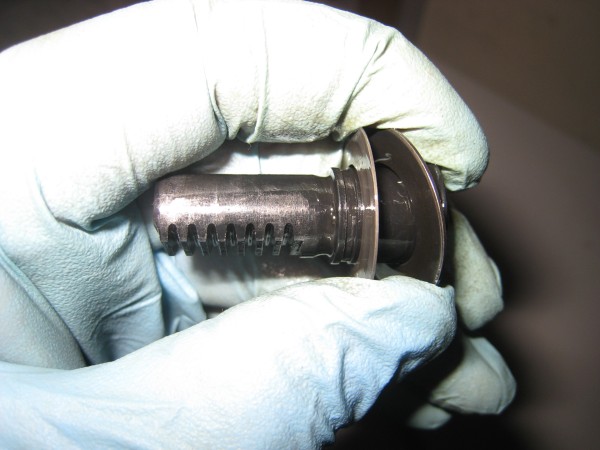
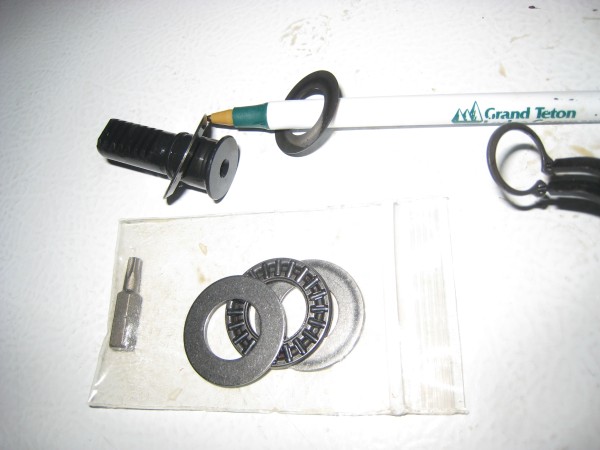
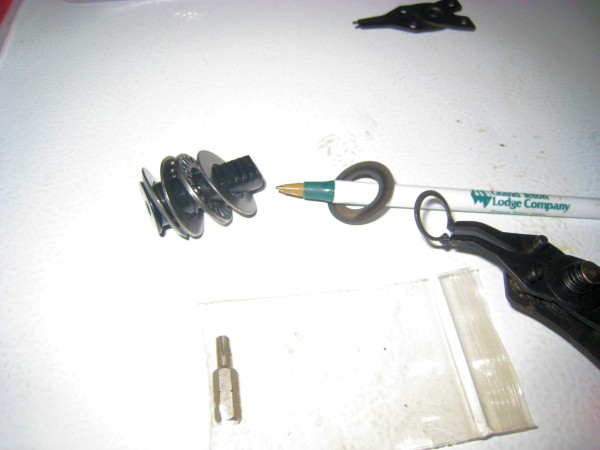
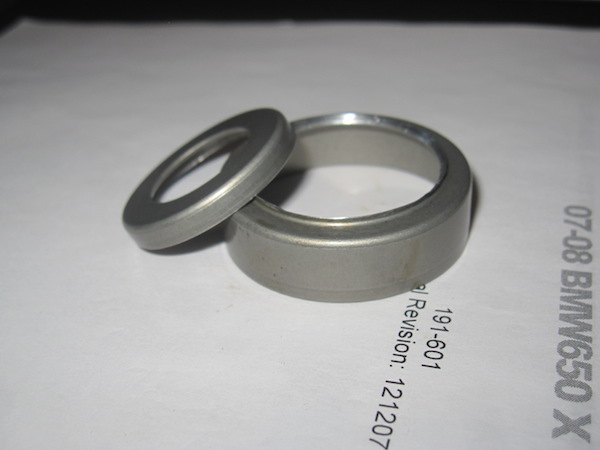
Shown below is the OEM throw-out with the OEM Belleville (cupped) washer on top of the OEM spacer. Next, follow the directions to remove and set aside the OEM Belleville washer (it is not re-used but needed if OEM clutch is re-installed later).
The next picture shows the OEM throw-out with the OEM Belleville washer already removed and onto the ink pen on the right, and below that the sandwich of the flat thrust washer / needle bearing / flat thrust washer to be used in the next step:
** Page 7: **
Step 21 and 22:
This shows the OEM throw-out with the Rekluse thrust needle bearing sandwiched between the 2 Rekluse flat thrust washers. Then the Rekluse spring carrier and C150 Wave Spring:
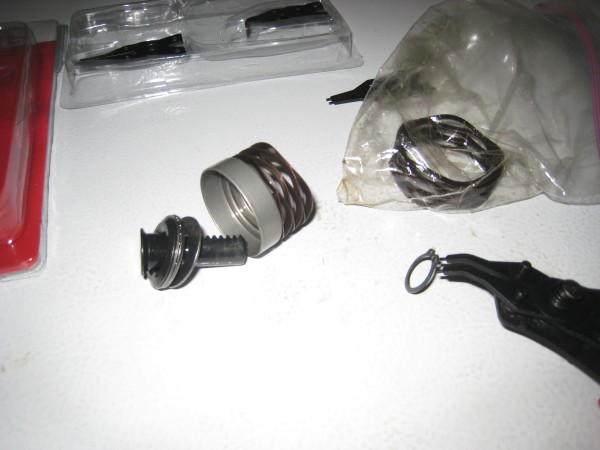
NOTE: The purpose of the C150 Wave Spring is to simply put some tension on the clutch lever at the handlebars so it is not floppy. UPDATE: As we will see later it is this spring carrier that was somehow sliced in half so the C150 Wave Spring was loose and ineffective.
Step 23:
Insert the throw-out assembly into the Rekluse pressure plate, compress the spring and secure with the OEM retaining ring.
This was a bit tricky for me as at first the retaining ring was sprung open too much and didn't sit well into the groove, so I thought I had to buy a new one.
But after calling Rekluse they explained that the retaining ring only has force on it until the clutch side cover is installed, so I could just re-spring it tighter and reuse it and it all worked fine.
Step 24:
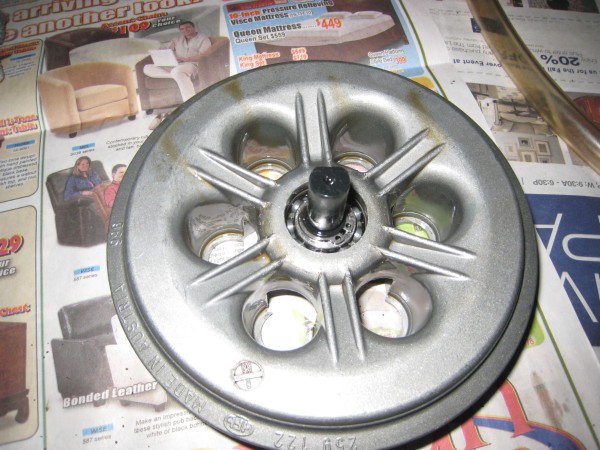
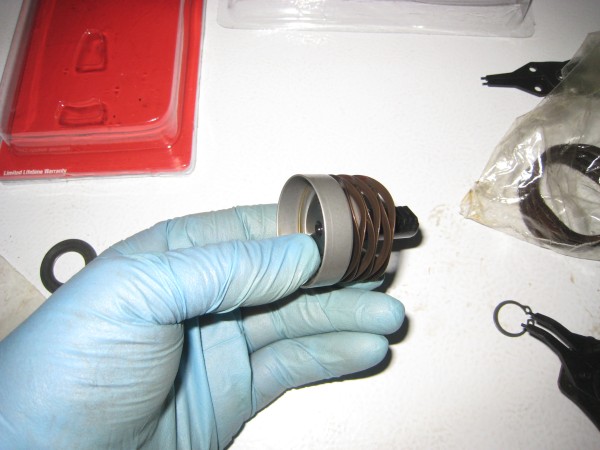
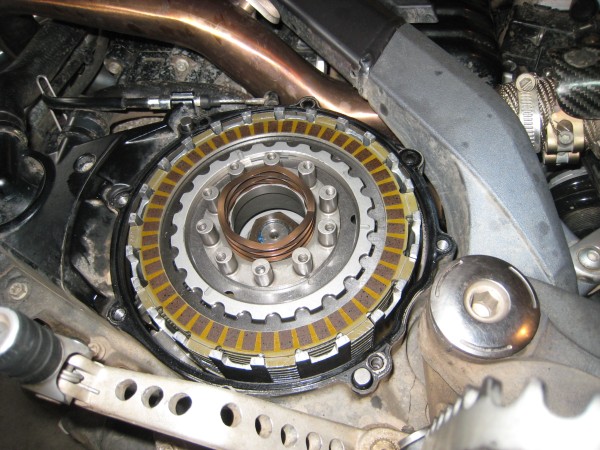
This shows the C200 wave spring on top of the lower rotating hub assembly:
Step 25 and 26:
A vital piece of information was not described in the Rekluse manual - how to tell the 18 tungsten carbide (TC) balls apart from the 9 steel balls?
Perhaps originally they were in separate baggies but someday you may need to know this as I did on this used setup.
The answer is two-fold: 1) The TC balls are 2x the weight of the steel balls and 2) The TC balls are LESS magnetic than the steel balls.
So I checked them with a magnet and also weighed them on a scale to tell them apart, then placed them intothe pressure plate per the instructions (6 TC then 3 steel, repeat).
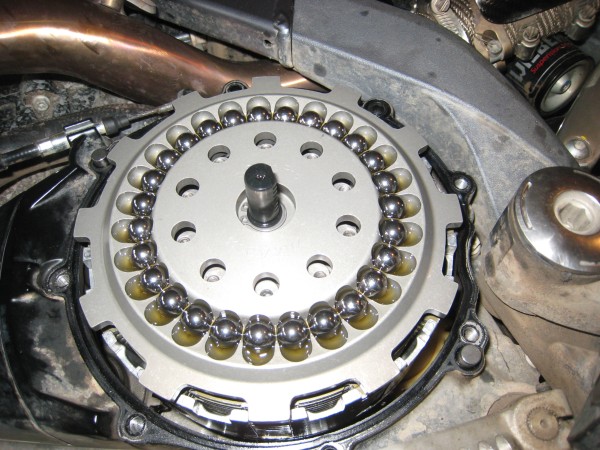
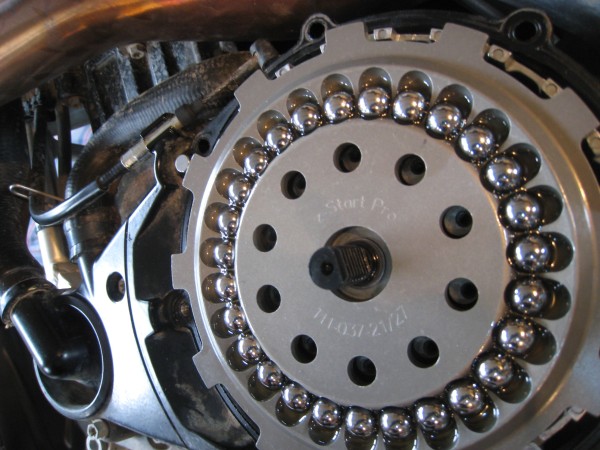
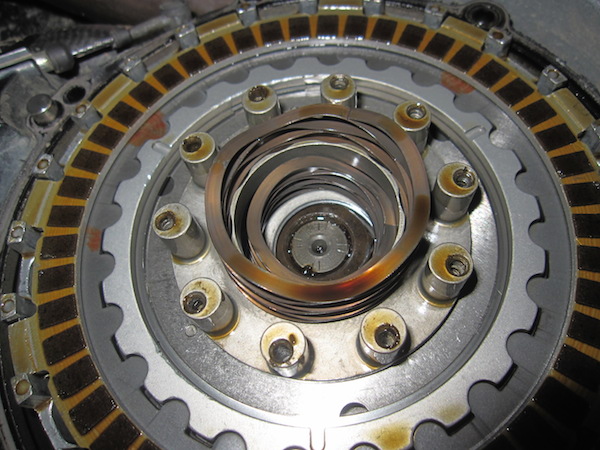
Step 27:
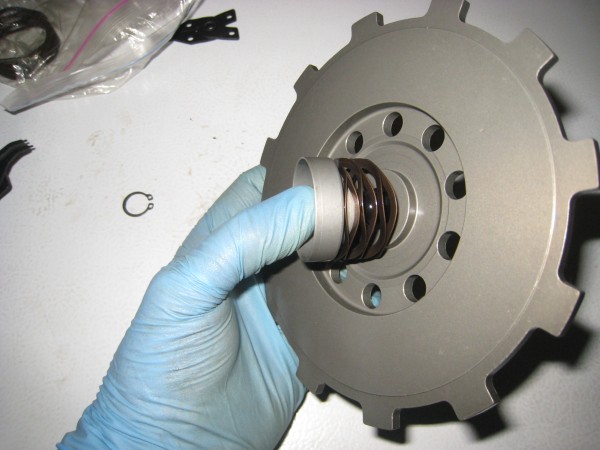
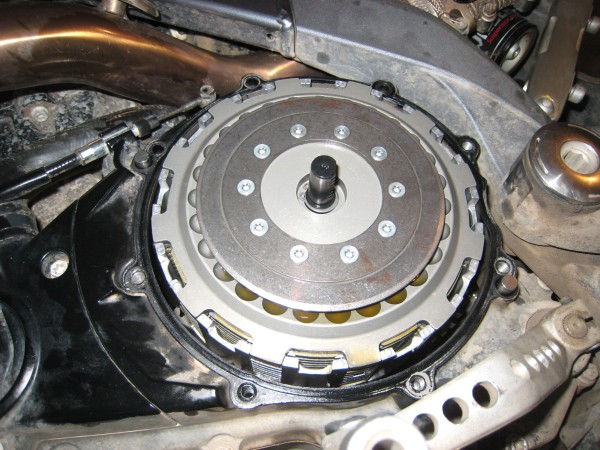
Now your bike MUST be laying on its side, then CAREFULLY place the Rekluse pressure plate loaded with balls into the basket, aligning it with the 10 rotating hub posts and with the clutch basket's deeper slots:
** Page 8-9: **
Step 28, 29, 30, 31, 32:
Insert only 2 Torx screws, lightly tighten them BUT TIGHT ENOUGH TO BE SEATED FULLY. Then check clearance with the two 0.050" no-go wire gauges per instructions.
Keep the gauges on top of the friction surface while checking, so not too far, the directions are a bit confusing.
In my case, since my friction plates were a bit worn, I had to follow step 32 and replace the top-most steel drive plate with the one thicker 0.065" special "Adjustment" drive plate.
I need to keep an eye on this as the friction plates will certainly wear more. I asked Rekluse if it is possible to replace a 2nd drive plate with a 2nd .065 adjustment plate, and this is possible but you have to be careful not to wear the friction plates too much!
UPDATE: 8/2014: After 4 years and 17k miles (mainly commuting), I checked the clearance and apparently the clutch plates have not worn much at all. Using the two 0.050" go/no-go wire gauges I could get one side in tightly but the other side I could not insert it all, not without prying the plates apart with a screwdriver. So my conclusion is that it really has not worn much if at all.
** Page 10: **
Step 33 and 34:
Using blue loctite 243 (oil resistant), insert all 10 screws and torque per manual (14 in-lbs):
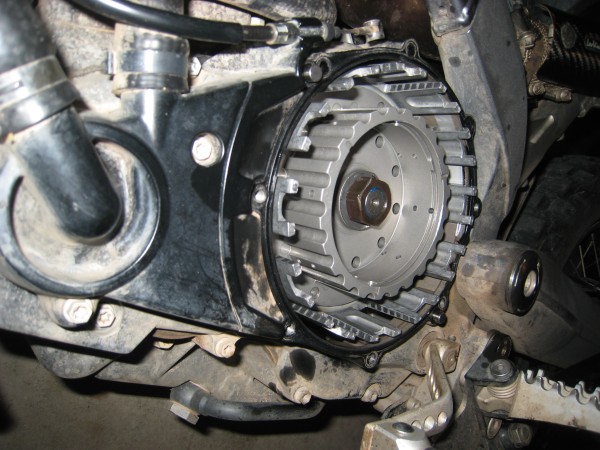
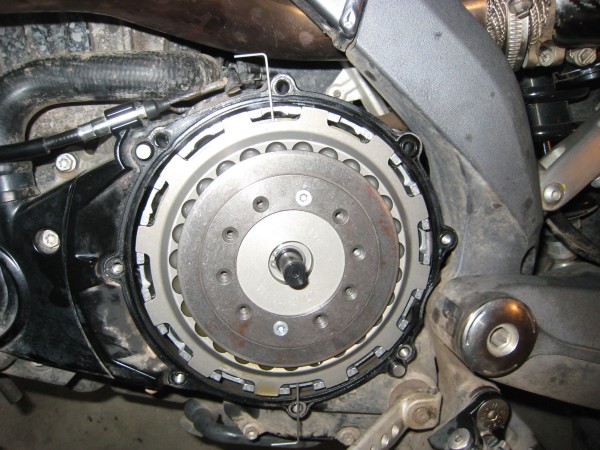
Step 35 and 36:
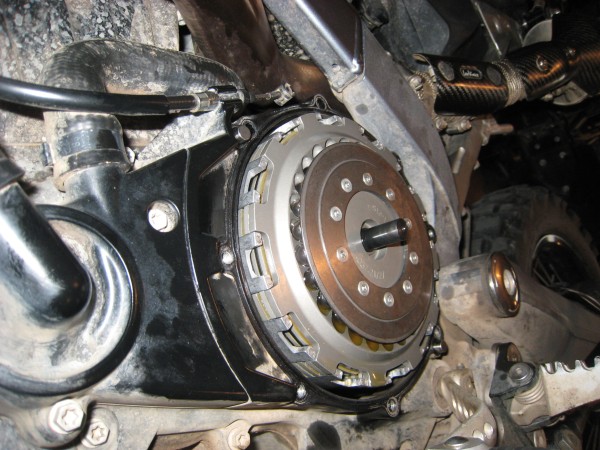
Note how to align the teeth in the clutch throw-out before pushing cover onto it. (Also see step 5 pics):
Step 37-41:
I skipped steps 38, 39, 40.
Steps 37 and 41 are inter-related. In step 37 when I set the clutch actuator arm it was very tricky to set along with the clutch lever free play.
At first there was way too much free play and the clutch would never disengage.
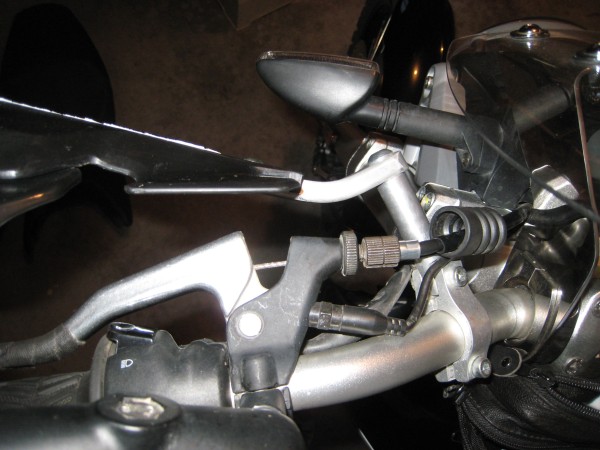
Carefully follow the section "Setting Clutch Cable Slack" on page 11, including the separate "Break-In Tuning and Maintenance Guide".
Also if you look in the first picture at the cable fork lever that the cable attaches to, the lever should be as much at a right angle to the cable as possible to provide the most travel, in fact it might be against the clutch cover as long as the minimum free play is obtainable. So in this picture it is not as much as it should be. To fix this, remove the lever and slide it onto the operating shaft on a different notch, and adjust the cable tension.
Next is a picture showing the 2 halves of the C150 Spring Carrier (P/N 115-003A) that had sheared in half. This explained why the clutch lever was floppy and loose as the spring was not effective.
I called Rekluse and talked to the main designer Sean who knew this assembly. At first he could not imagine why it sheared in half, but when I told him about the known issue with the worn hole inside the clutch cover, that made more sense.
It is possible that the throwout rack was allowed to wiggle sideways which put side stress onto the spring carrier and the rotating assembly was sliced in half.
Rekluse sent me a replacement spring carrier which I installed.
Before I finished the assembly and filled the motor with oil, I also replaced the clutch side cover with the improved '09 side cover with the steel insert in the hole so it won't wear.
That repair is explained HERE.
Back