 Back
Back
2012 Kawasaki Teryx
Mod: MotoAlliance Snowplow
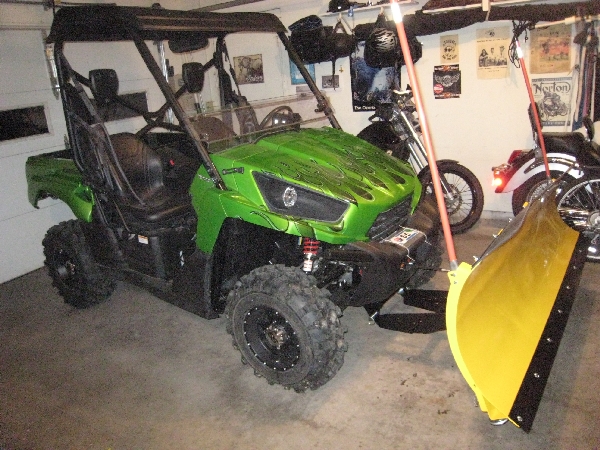
This describes the assembly and mounting of the MotoAlliance snowplow on my 2012 Kawasaki Teryx LE SGE. The tricky part was the fitment of the Plow Mount plate that mounts onto the Teryx itself.
Index:
Products being installed:
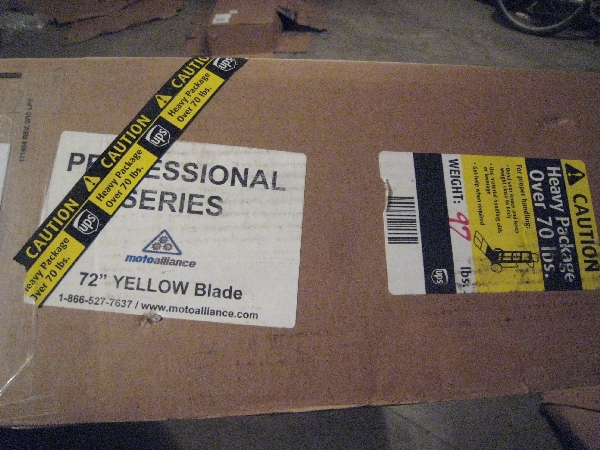
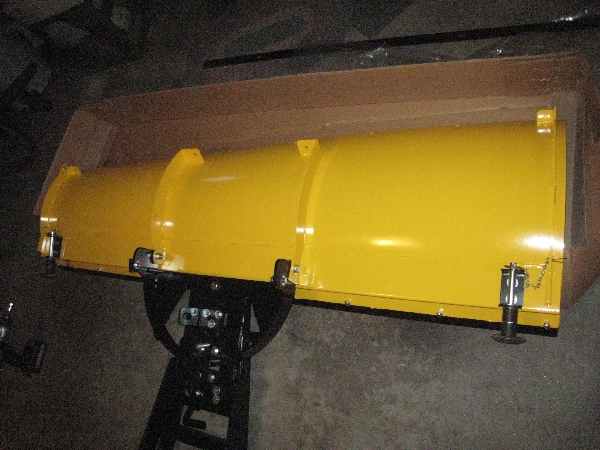
The exact plow being installed is the MotoAlliance Pro Series UTV Plow Kit with a 72" blade in yellow.
Also includes the MotoAlliance MA11733 Plow Mount plate, the only Teryx specific part (shipped in a separate box) which is installed directly onto the Teryx.
The blade itself has some noteworthy features:
- A "county" style blade of 11 gauge steel, meaning it is tapered in a way to throw the snow to the side better. This is the only manufacturer of a 72" county blade that I could find, at least in this price range.
- Strong 3/16" thick grade 50 steel wear bar, a thick rubber flap on top of the blade, side markers (flags), adjustable skid feet.
- The push tube appears strong with 5 angle adjustments via a foot operated latch, and attaches to the plow mount plate on the Teryx with 2 quick release pins.
- A 3 year warranty.
This blade and push tube assembly was just redesigned when I purchased it in November 2012, in fact I had to wait several weeks for the first production run.
They beefed up some of the strength issues and I know they added welded nuts onto a lot of the push tube bolt areas to make it easy to assemble (which it was).
So older versions of the MotoAlliance plow blades may possibly have issues that have now been resolved, I really don't know about the previous versions.
MotoAlliance, the company: My impression from reading online and from my own experience is that MotoAlliance is a small fairly young company that is very responsive to customer input and improving their design. They are small enough that you can work with them directly, in fact I was even in contact with the design engineer before I decided which brand to buy.
However there have been some downsides like missing assembly instructions and it has been very difficult to reach them on the phone. I expect these to be startup or seasonal issues because my purchase was during the introduction of a new version of the blade that had just been introduced and I think being a small company they were swamped.
So I have no problem recommending it. I've used it just a little bit (mostly clearing snow off of a lake for ice skating) and it worked great.
Assemble the Push Tube and Blade:
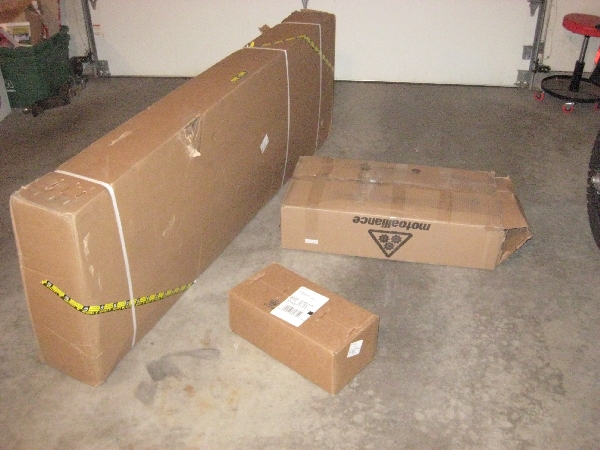
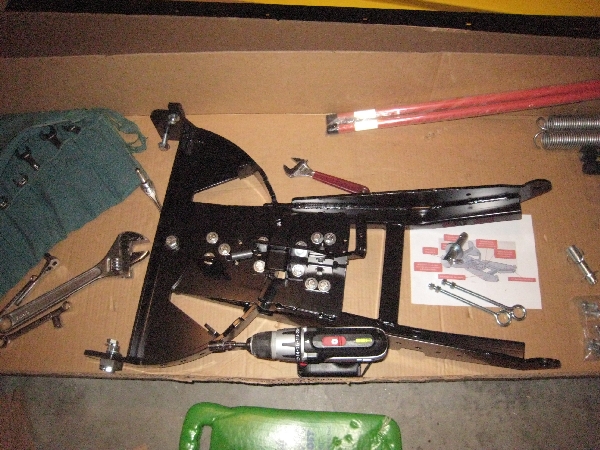
The product arrived in 3 HEAVY boxes: the blade assembly, the push tube, and the Teryx specific MA11733 plow mount:
Assemble the push tube assembly:
There were huge part bags and there were no instructions (hopefully they have remedied this) but I figured it out and confirmed it later with the instructions when they were emailed to me.
Note in the 3rd pic below the big pivot bolt at the front of the push tube, tighten this but no so much it won't pivot freely. I put all the bolts in loosely first then tightened them all.
Assemble the blade itself:
First I attached the lower steel wear bar then the adjustable skid feet (not all the thick spacer washers would fit actually).
Next I connected the push tube to the bottom of the blade where it will pivot then attached the thick upper rubber flap (2nd pic below).
Finally the eyebolts and kickback springs. Later I learned that both nuts on each eyebolt should above the stop plate so one can act as a jam nut to lock the other one.

Note: after using the plow, the rubber top flap is SO beefy and thick that the dry snow around here flies straight up in the air and into the cab. I decided to bend the flap over by setting a metal cycle ramp on it for awhile to bend it over. I think this will work better and over I'm glad to have a thick rubber, which is a new improvement.
Prepare winch assembly bolts:
This is a fix for the winch mount in order for the plow mount to now be able to be attached to the same bolts that they share.
In my case I had already installed a Warn winch and for a winch mounting plate I used the MotoAlliance winch mount plate (MA11933) hoping it would be more likely to be compatible with their plow mount plate.
It was a good idea and the bolts line up fine but I ran into a snag. I mention it in my Winch install page but here is the full description of the problem and the fix:
THE PROBLEM:
The problem is that the winch / winch mount plate assembly mounts to the Teryx with 4 carriage bolts installed from the top side, with the heads being inside the plate and the bolts hanging down loosely.
But the Plow mount plate we are trying to attach (from the underneath) now needs to attach using the same front 2 carriage bolts but there are 2 problems:
- The bolts are not captive and when you try to remove the nuts and hold the plow mount up to it for mounting, the bolts will move up and fall out. The plow mount has a deep recess and you cannot reach the bolt threads in order to hold them in place.
- The bolts are not quite long enough for the nylock nuts to lock because of the added thickness of the plow mount plate.
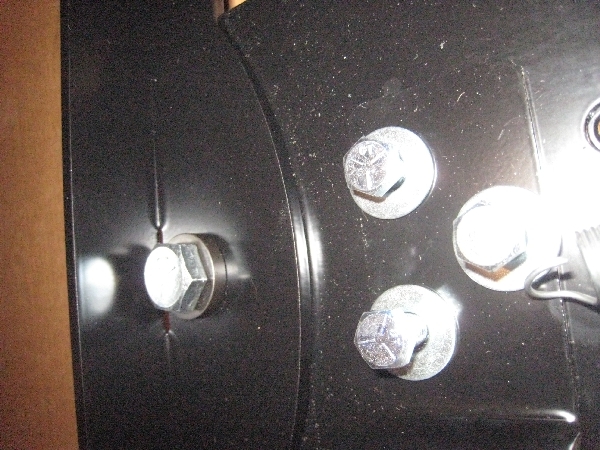
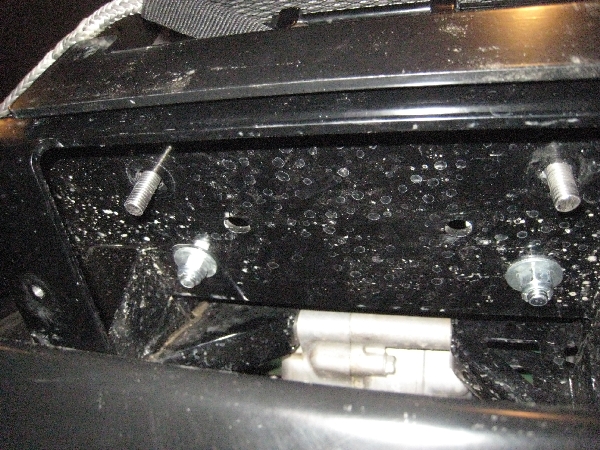
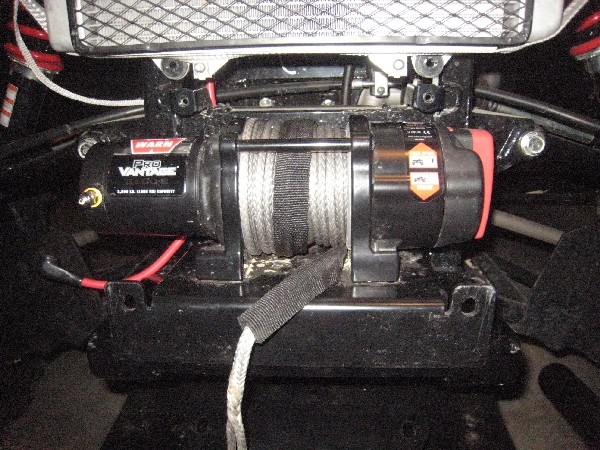
Here is a preview of the solution, but it shows the front 2 bolts that the plow mount plate has to attach to:
THE FIX:
The bottom line is that the winch has to be installed to the winch mounting plate in a different manner BEFORE it is then installed onto the Teryx.
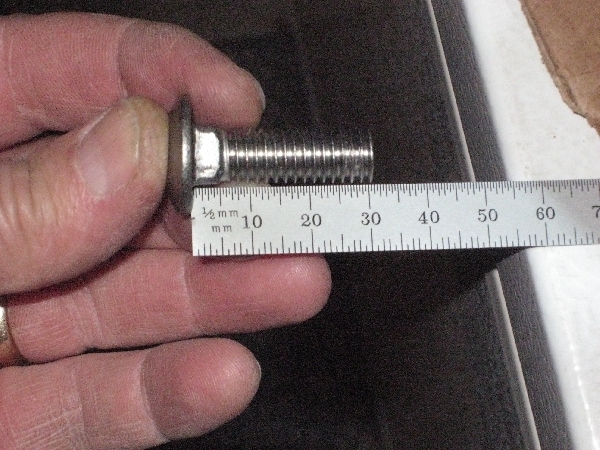
For the 2 front carriage bolts, you have to provide longer (30mm) bolts AND a way to hold the topside heads captive.
FIRST you must cut down 2 carriage bolts to be 30mm long. They have to be long enough to engage into the nylon portion of the nylock lock nuts, but if they are too long you simply cannot insert them into the winch mount plate because there is not enough clearance.
I chose stainless bolts so that after I cut them they would not rust due to no plating on the ends.
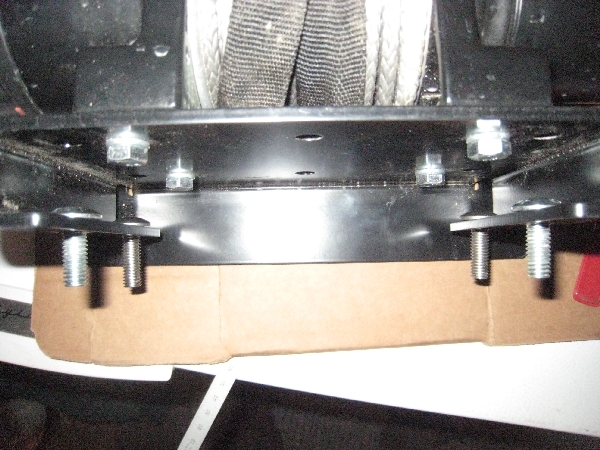
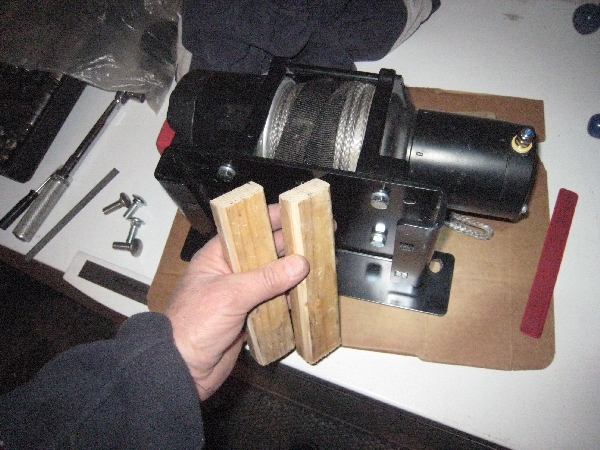
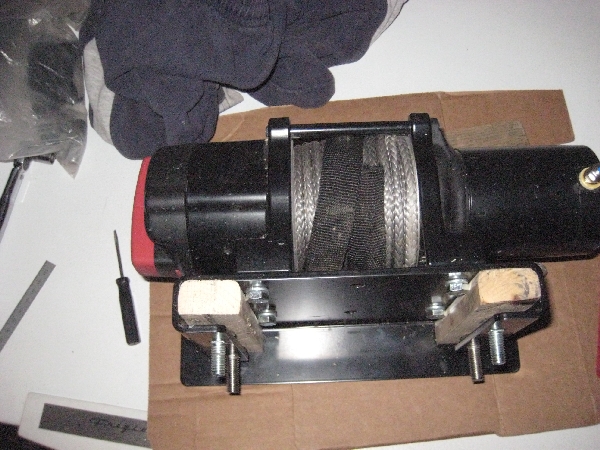
SECOND is the key part, there may be a better way but my solution is to cut a block of wood just the right size so that when it is jammed against the top of the bolt heads they are firmly held captive and will not be dislodged later.
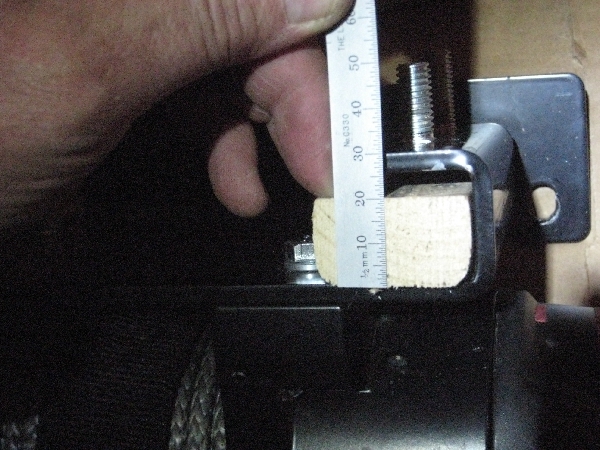
The dimensions of the wood are about 20mm thick and 35mm wide and long enough to take up most of the mount plate length.
I think wood should work well as it is just pliable enough to wedge in properly.
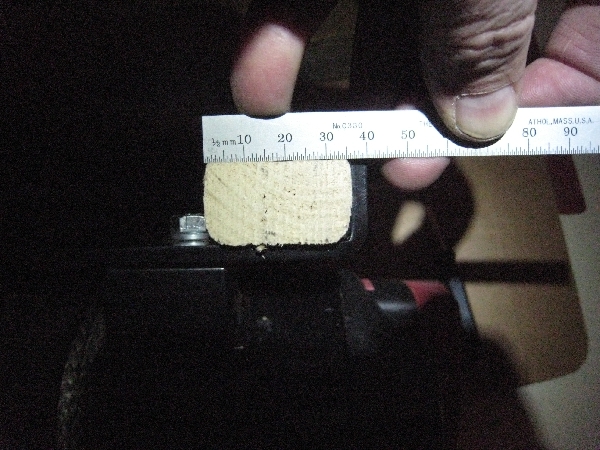
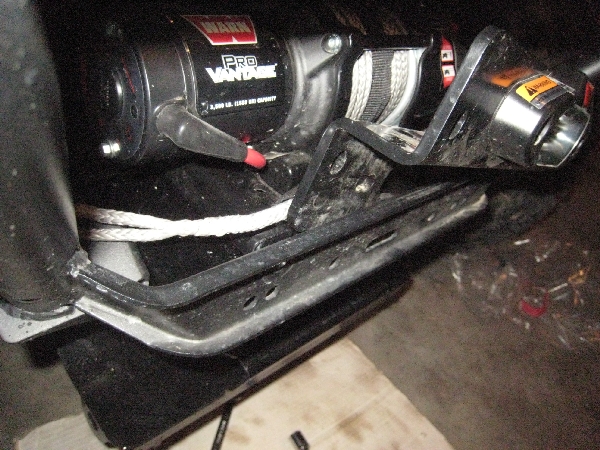
This picture clearly shows the wood pressing against the head of the carriage bolt:
Now the winch assembly is ready to be installed in a later step.
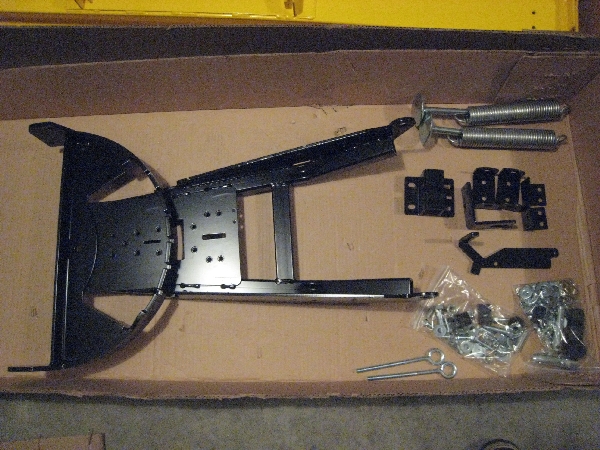
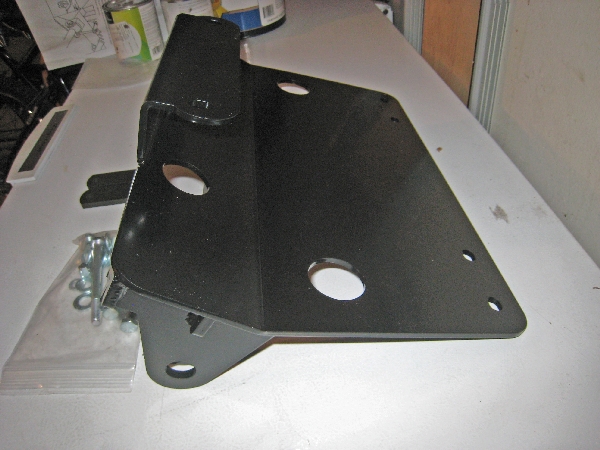
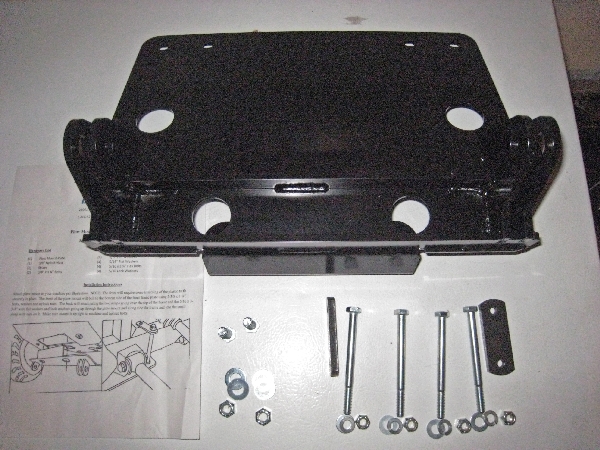
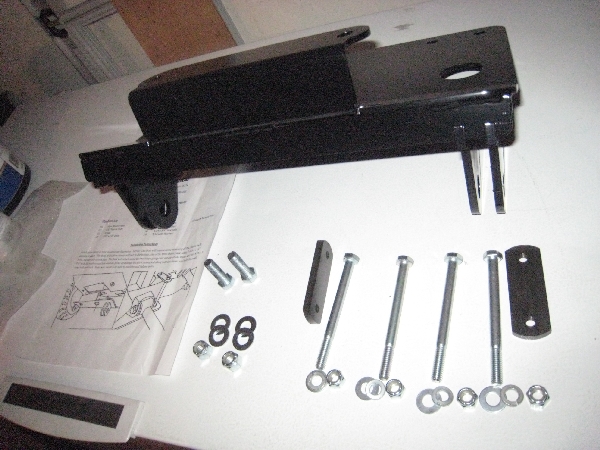
The MA11733 plow mount plate:
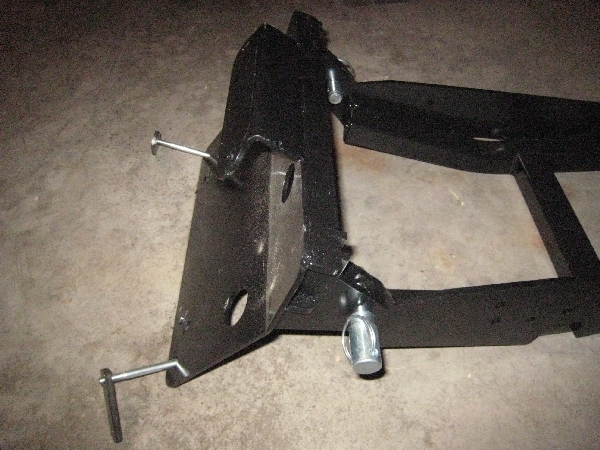
Here is a look at exactly what the MA11733 plow mount plate looks like:

The 2 short bolts on the left are not used since the carriage bolts prepared earlier in the winch mount are used instead. The other hardware consists of 2 sets of two long bolts/locknuts/washers and a thick strap that clamps around the Teryx frame at the 2 rear corners of the plow mount plate:
Install Plow Mount Plate:
First take off the hood and the plastic bumper shroud. Note that later you will have to trim the plastic bumper shroud to allow for additional clerance for the plow mount plate.
Now remove the metal bumper itself. Assuming you already have a winch installed then this will including removing the winch fairlead bracket with the 2 bolts that go through the bumper and hold it on as well.
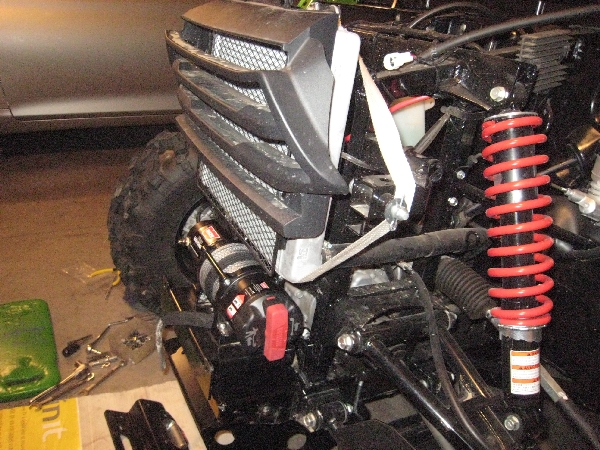
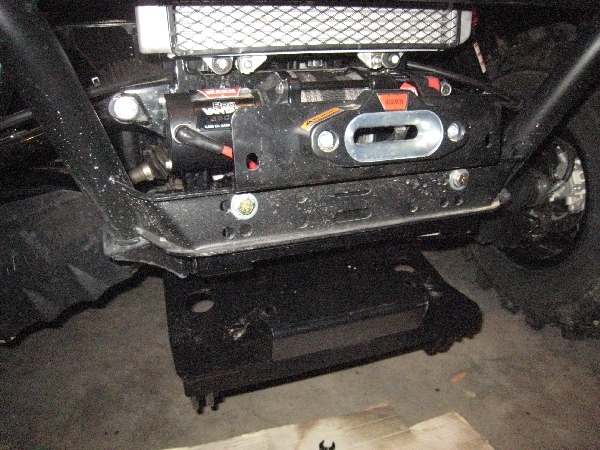
Then at least on my 2012 Teryx it is helpful to unbolt the 4 bolts holding the radiator and hoist it up out of the way with a strap to give more room to insert the winch assembly:

Now insert the pre-assembled winch assembly onto the Teryx winch mounting area. It is simple now that the 4 carriage bolts are fixed in place as described above.
Put nuts (and washers) underneath on the rear 2 bolts that attach the winch assembly to the Teryx frame area, but do not tighten them yet just snug them so it can still move around a little bit.
Re-attach the radiator with the 4 bolts.
Attach the red (+) and black (-) cables to the winch (low torque per instructions):

Install the metal bumper assembly onto the Teryx but do not tighten the 4 bolts fully, just snug them so the bumper can move.
Insert the fairlead bracket assembly between the winch assembly and the bumper using the 2 bolts you removed previously.
Tighten these bolts in order:
First FULLY TIGHTEN the 2 fairlead bolts which will pull the winch assembly forward and the bumper back until they align with the Teryx frame.
Then FULLY TIGHTEN the 4 bumper bolts then finally the 2 rear winch assembly bottom bolts.
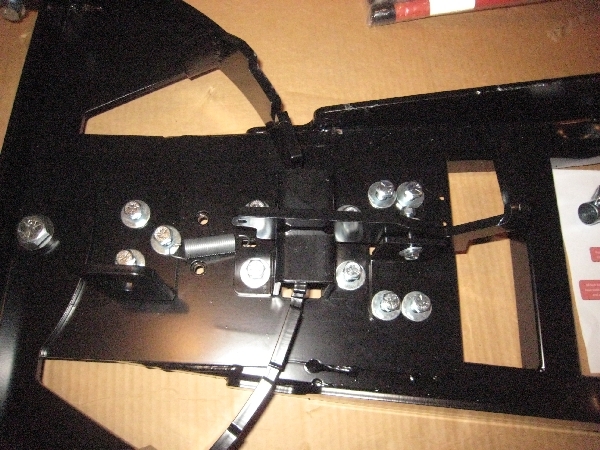
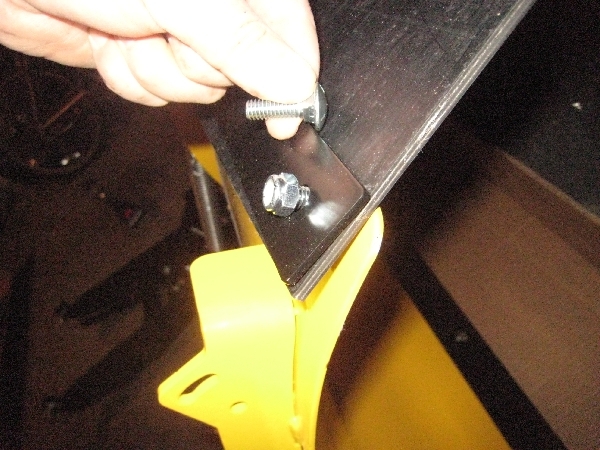
Now you are ready to attach the MotoAlliance MA11733 plow mount plate. The best way is to first install only 1 long bolt/washer up through the outside hole on each rear corner of the of the plow mount plate then through 1 hole in the thick strap itself (then washer and locknut).
The 1st pic below shows the single rear bolt and strap on each corner is attached. You can also see in the picture that the plow mount plate is attached to the push tube with the 2 quick release pins. This was just a trial attachment, you should detach it from the push tube then continue with the installation.
Now hold the rear of the plow mount plate up to the Teryx frame and rotate the strap on each side over the Teryx frame and the strap will hold it up while you attach the 2nd bolt/washers/locknut to the 2nd hole in the thick strap, on each side. You will need to drill a hole in the plastic skid plate under the Teryx for each of these 2 inner bolts to pass through, and make it big enough to allow for some adjustment later.
Snug the bolts on the straps so it hangs from the Teryx frame but keep it very loose until later.
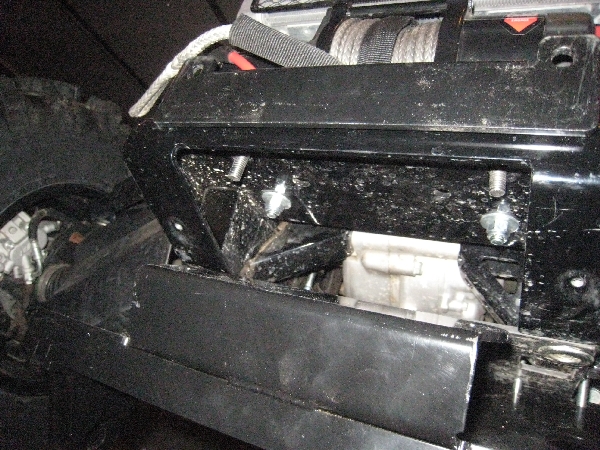
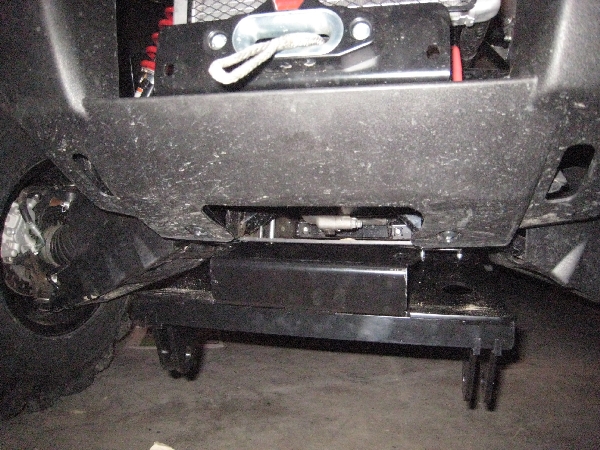
The 2nd pic below shows the front 2 carriage bolts that you will be attaching the front of the plow mount plate to (Note the pic is wrong and should show the bumper attached at this point in time actually). Now wiggle and adjust the plow mount plate and its rear bolts/straps forwards and backwards until the 2 front holes in the plow mount plate align with the 2 front carriage bolts.
You can raise the front of the plow mount plate up and down easily by hand until the holes in the front are aligned, but do not attach it yet, just align it:
Before you proceed, be sure you have FULLY TIGHTENED all the bolts in the previous steps as described earlier. All bolts except those on the plow mount plate should be tightened to the correct torque before proceeding.
Before you re-install the plastic bumper shroud you will have to trim it to allow for additional clearance for the plow mount plate as shown below.
I made a paper pattern then drew around it and cut it with a sabre saw.

Next install the plastic bumper cover as shown.
Then begin to raise the front of the plow mount plate by tightening the 4 rear strap bolts on the rear corners of the plow mount plate itself, and that will raise the front automatically for you.

Now by tightening the 4 bolts on the 2 rear straps, raise the front of the plow mount plate fully until the 2 plate holes go over the 2 bolt threads. At that point add the washer and nylock nut which is a bit tricky.
Take a socket and a socket extension then put the nylock nut in the socket and hold it upwards then put the washer on it, hold the washer in place with a long piece of masking tape. Then move the whole nylock nut/washer assembly up to the threads and screw it on.
FULLY TIGHTEN these 2 nuts that now hold both the front of the plow mount and the winch mount to the Teryx frame.
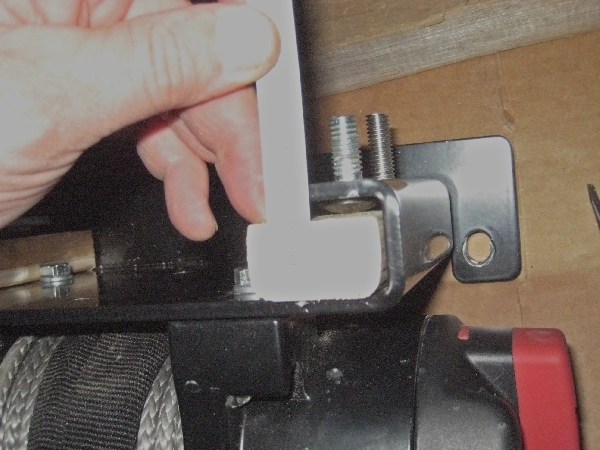
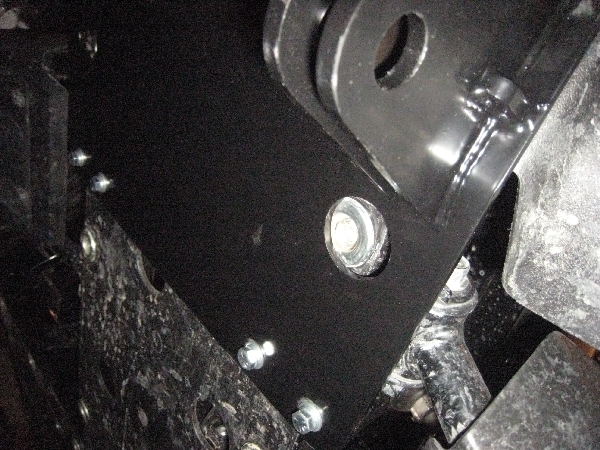
This pic looking straight up shows the front mounting bolt with the nut and washer attached:
Finally straighten/align the 2 rear bolt/strap assemblies and FULLY TIGHTEN those 4 bolts as well.
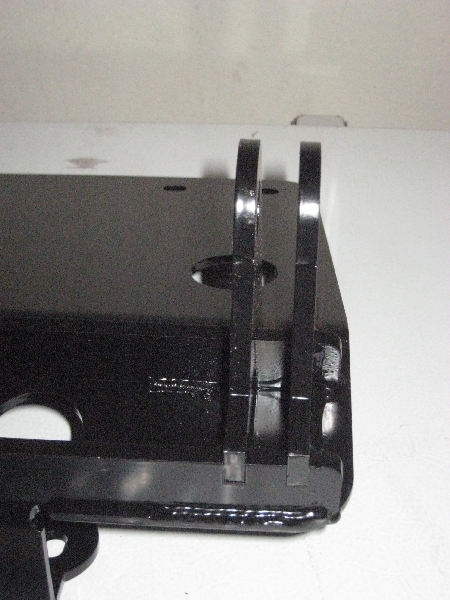
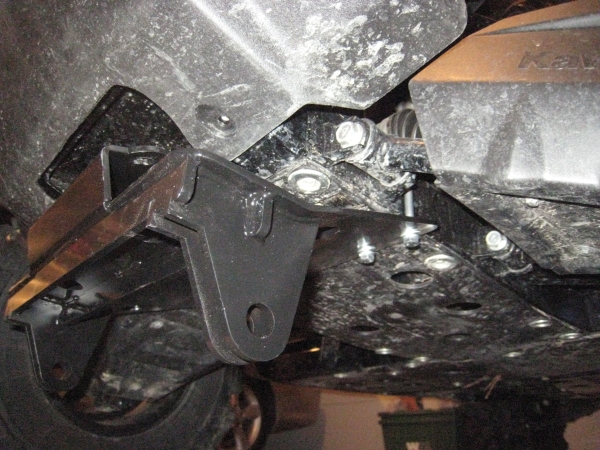
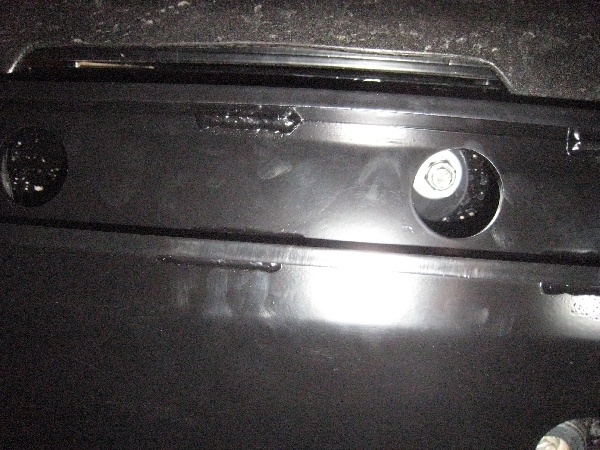
This pic is looking from the front to the rear of the plow mount plate, showing the connecting tabs in the front. You can also see it does not align exactly with the Teryx hex head/big washer assembly, but they are almost flush with the frame so it is ok really. This may mean the 2012 may have changed from the previous years when the plow plate was patterned. It is not really a problem.
At this point ALL BOLTS should have already been FULLY TIGHTENED!
Ok the plow mount plate is now installed. For me it hangs down a bit too far to safely do rock crawling so each Spring I will be removing the plow mount plate, but this will be easy now that I have made the front 2 carriage bolts captive!!!!
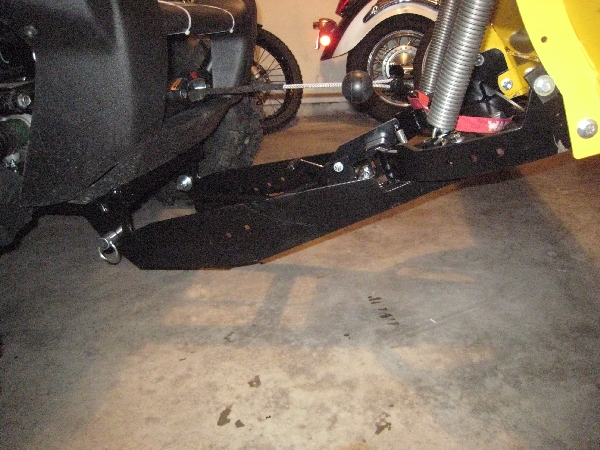
Attach snow plow to Teryx plow mount plate:
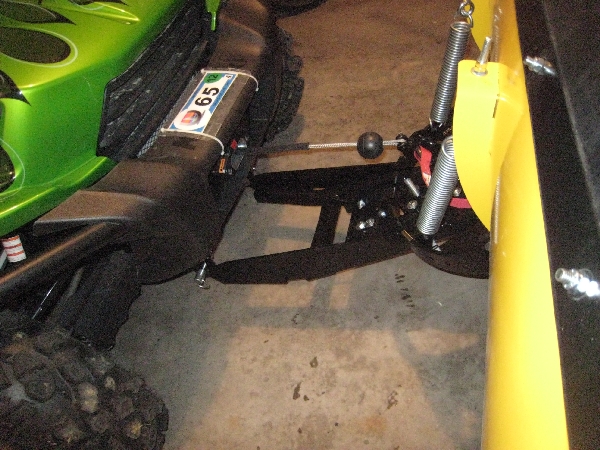
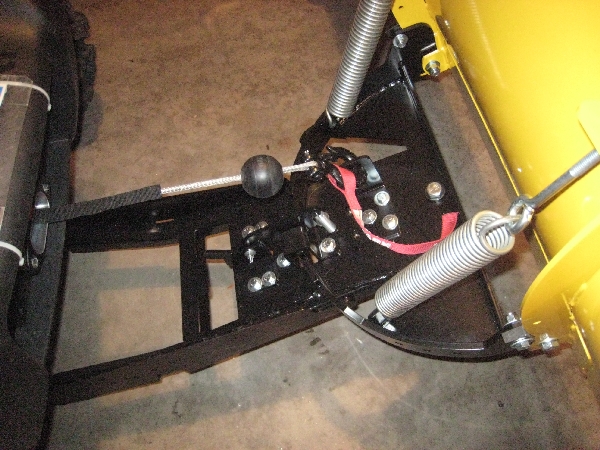
When you want to plow, all you have to do to mount the plow blade is attach the push tube to the plow mount with the 2 quick release pins. Insert each pin then push the big washer over the end of the pin and ball lock, which helps it stay on apparently.
Then attach the winch hook to the blade. Note the black ball on it is an $8 Kong Ball for dogs, it already has a hole in it and is damn tough.
These pics are with the blade raised up.
Back