 Back
Back
Provided here is a very detailed description, as I spent a lot of time figuring out what shock dimensions I needed and how to find a reasonably close fit in a shock. So I figured I'd write it all down and hopefully this helps someone else!
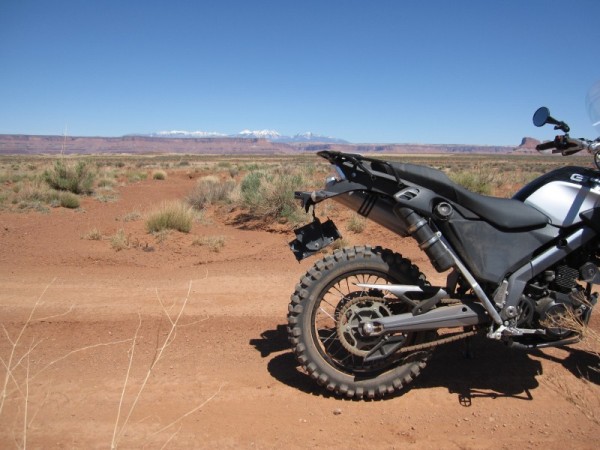
My first disaster was when I modified the rear fender by removing the large mud guard then went on my first real off road ride
and the first big dip I hit I bottomed the shock and the rear knobby snagged the bottom lip of the rear fender and ripped the fender in half.
This problem is compounded by the poor fender mounting that makes it VERY floppy, which is a separate problem that I solved as well (see fender support).
Also I think removing the large lower mud guard made the fender shorter which gave it an edge for the knobbies to catch on, which made it worse.
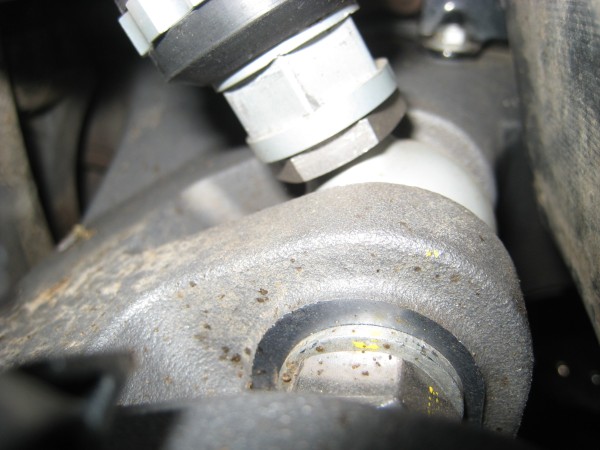
From checking the loaded sag on the bike, it is obvious that the spring weight on the Sachs shock is too light and that the hydraulic preload is not adequate. And when I pulled the Sachs shock off to install the Wilbers, I saw fluids had leaked around the top of the rod and that the big black preload knob would just spin freely.
Clearly I had blown out the hydraulic preload circuit. Many have complained about this problem forcing them to buy a new shock. Since I had set the preload to max I never checked it again or I may have seen it before it was out of warranty.
I complained to the dealer about the shock bottoming on the slightest dips but I doubt if they even inspected it - it is hard to see with the gas tank surrounding it, you would need a flashlight and these guys don't impress me - they can't even put my seat back on without smashing the plastic tabs on the pan.
And when I got it back from them my rear brake squeaked which it never did before.... but I digress.

##### The following was ADDED 4/2023: See measurement details in .XLS spreadsheet found later:
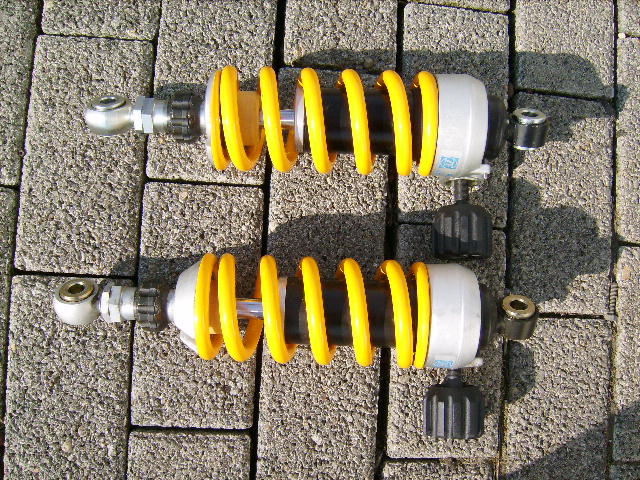
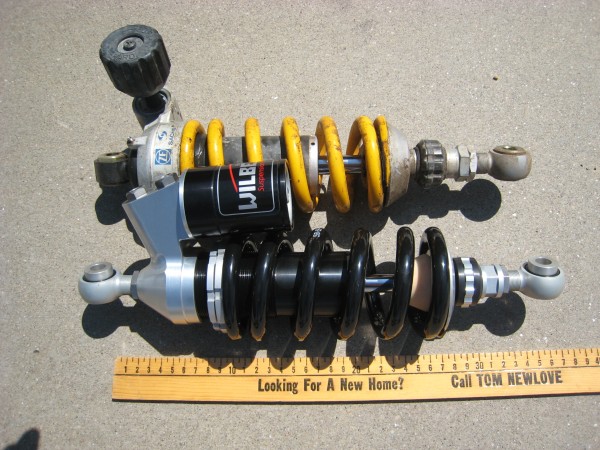
Here is a photo from an AdvRider of the 2 OEM Sachs shocks, '09 on top and longer '07 on the bottom. It appears that each adjustable lower eye is set to the shortest possible length. If you have the shorter '09 bike then consider if you would want the much longer '07 length of shock, with longer wheel travel and taller ride height.
Also perhaps check the loaded sag on your bike. This gives a big clue as to how well (or even *if*) your hydraulic preload is working (the big black knob on top of the Sachs shock) and if your spring rate is too soft.
There are places that describe how to do this, one is at Moto-Pro.com click on the .pdf for Setting Rear Suspension Sag. Another place is 4strokes.com
Due to the geometry of the X bike, the wheel travel = 3.44 * stroke. For the OEM shocks, the wheel travel is a spec, but for the Wilbers shocks it is calculated from knowing the stroke.
2023: I have compiled a detailed list of dimensional information for the OEM, Ohlins, Wilbers, Yacugar and TFX shocks, including sag measurements for my bike:
Shock dimensions (in mm): Wheel Travel, Stroke and (mounting) Length:
| Wheel Travel | Stroke | Length | |
| Stock BMW (Sachs) | (spec:) | ||
| 09 XCountry | 165 | 48 | 320 +-10 |
| 07 XCountry | 210 | 61 | 333 +-10 |
| 07 XMoto | 245 | - | - |
| 07 XChallenge | 270 | - | - |
| Ohlins | (calculated:) | ||
| BM633 XMoto | 247 | 72 | 343 |
| BM636 XChallenge | 305 | 89 | 360 |
| Wilbers 642 | (calculated:) | ||
| 07 XCountry Standard | 192 | 56 | 333 |
| 07 XCountry w/629 Adj. | 165 | 48 | 332 +-5 |
| 07 My Custom XCountry w/629 Adj. | 224 | 65 | 341 +-5 |
| 09 XCountry Standard | 175 | 51 | 324 |
| 09 XCountry w/629 Adj. | 165 | 48 | 323 +-5 |
| 07 XCHALLENGE Standard | 227 | 66 | 346 |
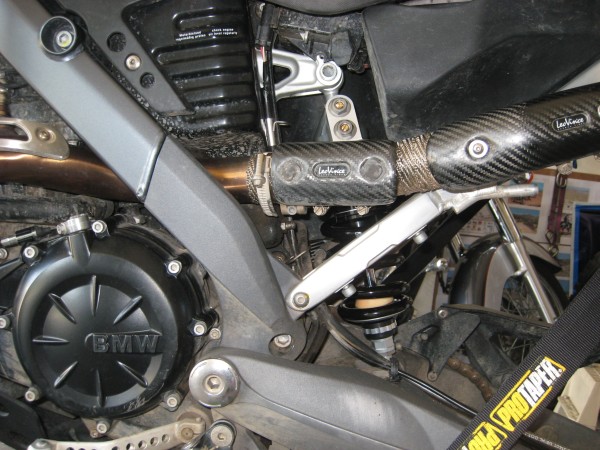

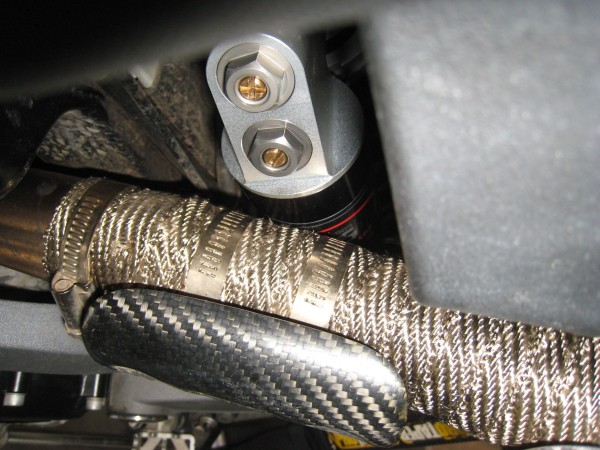
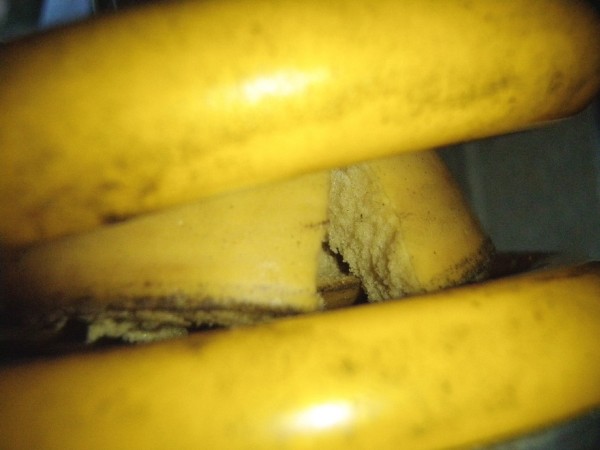
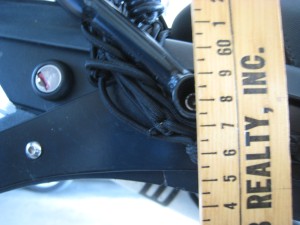
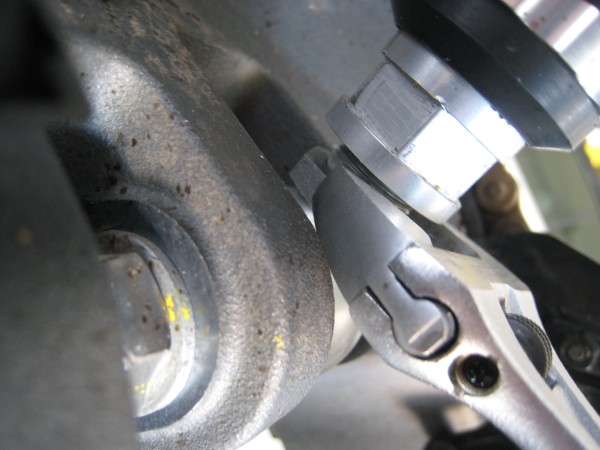
I even adjusted the mounting of the Leo Vince exhaust muffler out away from the bike as far as I could easily. I am not sure how a stock BMW exhaust would affect this clearance, and I also don't know if the 09 steel subframe would be different.
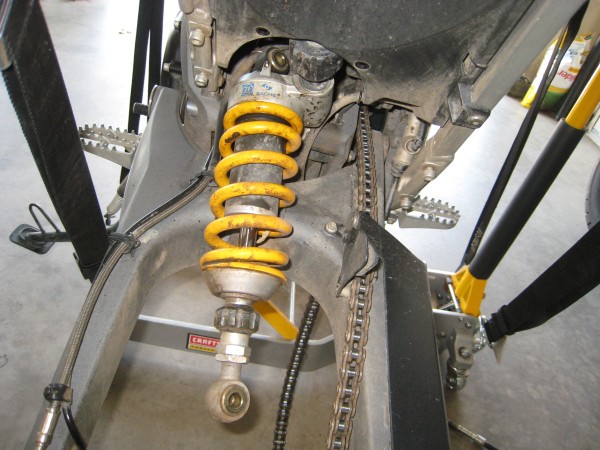
It is so tight between the pipe and the shock reservoir that I can slide a business card but I can barely fit a credit card between them!
So are there any options that would make the clearance better?
Well yes, in theory I could see 2 things:
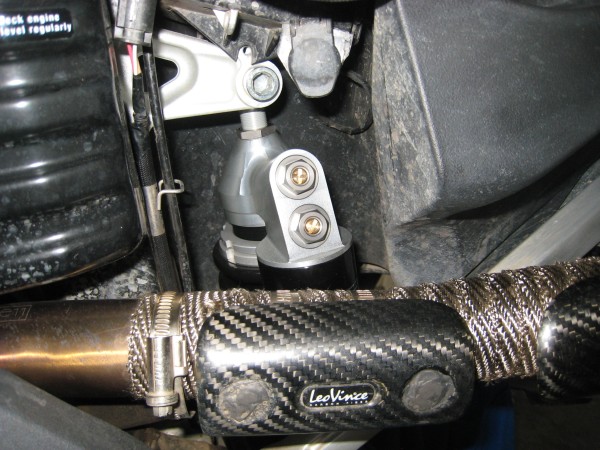
-First, if the reservoir could be rotated a tiny bit towards the rear, closer to the subframe as there is a bit more clearance to it. However I was told by the Wilbers factory rep that this is NOT to be performed as the top eye bolt could possibly leak out gas if this was done.
-Second, if the shock could be built with a shorter top eye, as there are a lot of threads showing, which would allow more rotation of the reservoir towards the back. However the bottom eye can NOT be any longer and still be strong enough so my shock can not be changed. So even *if* a different shock body could be setup by the factory it would require a completely different shock build and is not practical to coordinate.
After riding, the shock is hot, but no more so than the entire area around the shock, from the shock frame mount to the engine oil reservoir - everything is hot!
The factory told me that there is no problem with the heat from the pipe affecting the reservoir.
So the bottom line is that the shock has been tested for the XCountry and it does barely fit, even though clearance is minimal, so there really is no problem!
The preload on this shock is performed by moving the collar rings on the shock. I don't feel this can be done safely without removing the shock from the bike and using the provided spanner-like wrench (which won't fit while on the bike). If you try it while on the bike, with a long screwdriver and a hammer, and miss, you could punch a hole in the plastic gas tank!
So first I double checked the preload by measuring the loaded sag, Wilbers gives directions but they are just standard, the same as that described at Moto-Pro.com - click on the .pdf for Setting Rear Suspension Sag.
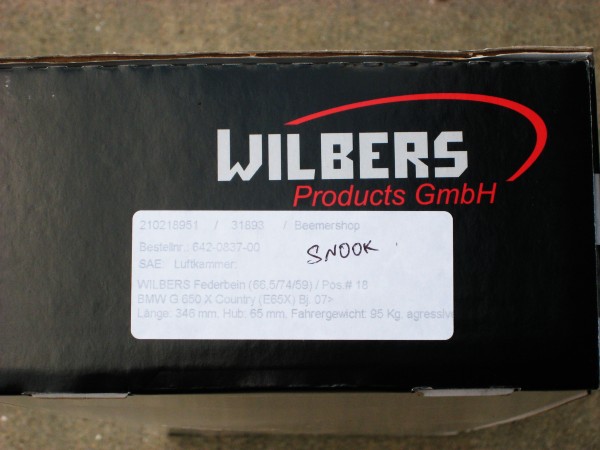
My shock was ordered for aggressive off-road riding and a weight of 210 lbs or 95 kg (this includes 20 lbs of gear, no passenger).
For off-road riding, a recommended loaded sag amount is roughly 30% (both Moto-Pro and Wilbers say this).
I measured my factory set Loaded Sag for a 196 lb load to be 28% and for a 217 lb load to be 30% (noting that this new shock has more wheel travel).
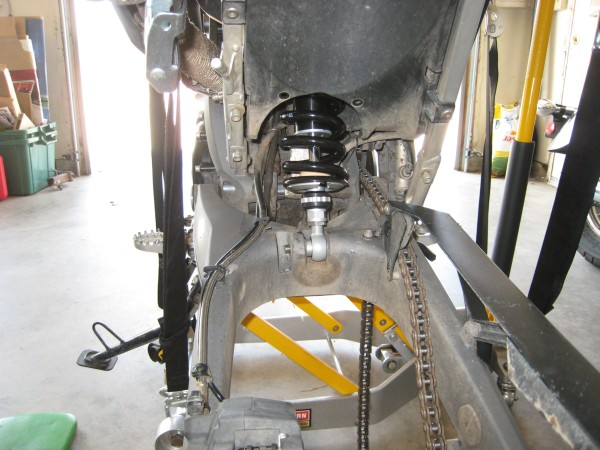
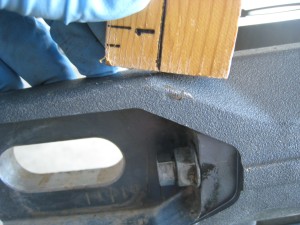
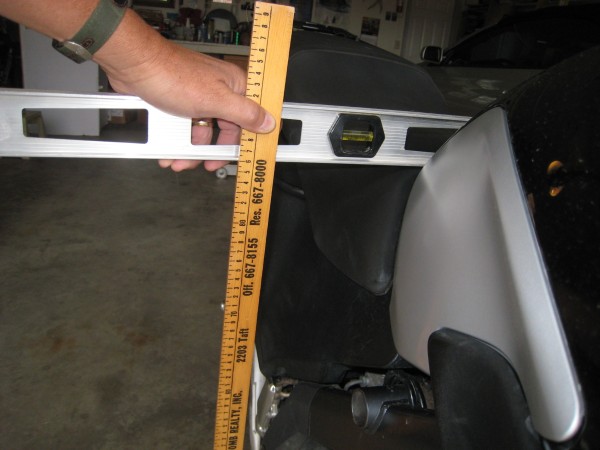
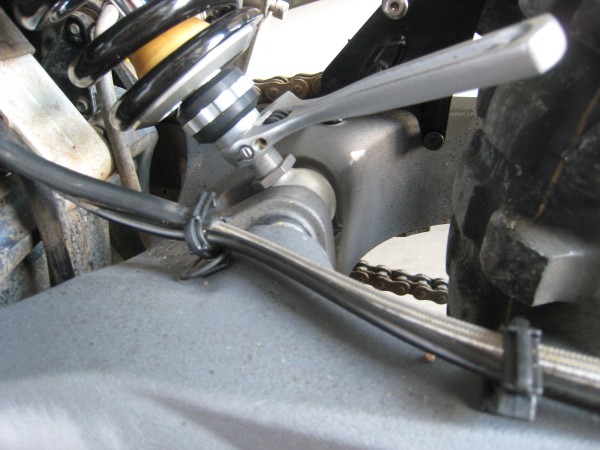
This seemed like the shock was setup fine. I measured from the swingarm to the top tail rack mounting point as shown:
If you read the Moto-Pro directions on step 5 it talks about checking Unloaded Sag as well and it verified that the new shock has a proper spring rate, but my original OEM shock had way too soft of a spring rate.
This was found when I measured the old Sachs (before the preload broke) and found the loaded sag was a proper amount but the unloaded sag was way too small (about 1/3").
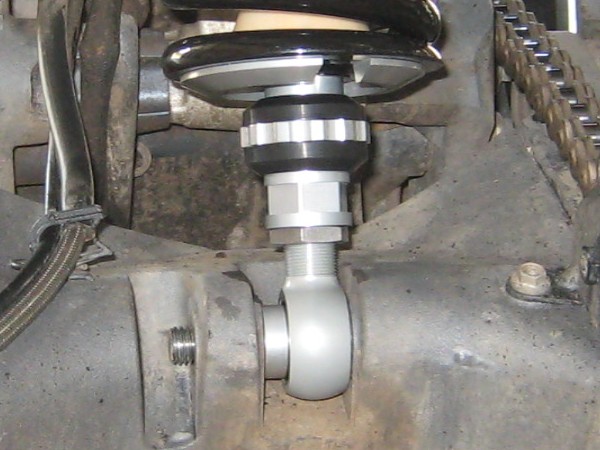
Later I had reason to change the preload by adjusting the top 2 nuts with the spanner wrench on the bench. In some cases like when shortening the spring to increase preload, I found the the entire lower assembly wanted to move as you turn the nut - this includes the spring and the lower eye (heim joint).
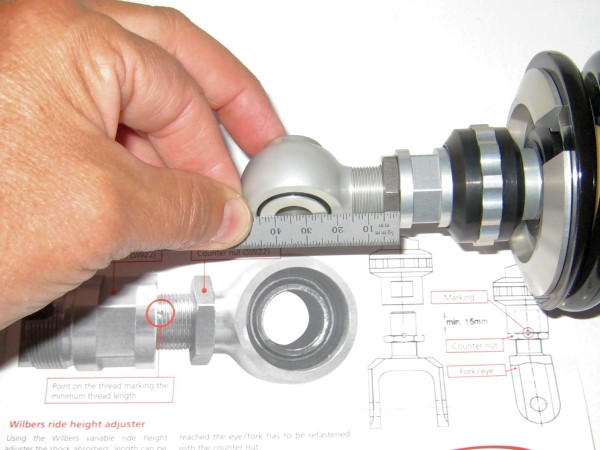
Instead of clamping it, I decided to let it turn (don't ask me why)... but in order to keep the lower eye aligned with the top eye which has a spacer offset onto only 1 side of the eye for mounteing, it is easiest to do in full 360 degree rotations. One rotation changed the preload by the thread pitch of the big shock body threads (and the 2 big nuts).
I measured 8 thread pitches to be 12 mm so one rotation then changes the preload by 1.5mm . In this manner I could change the preload by 3mm by doing 2 full rotations. This was verified by measuring before and after spring lengths as well...
More later on my experiments and affect on sag.
Adjusting the damping:
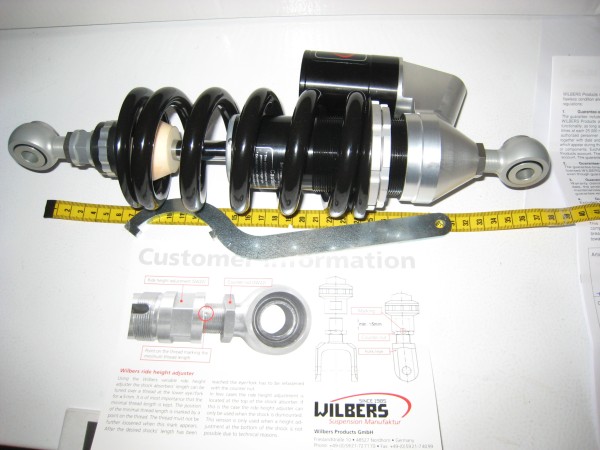
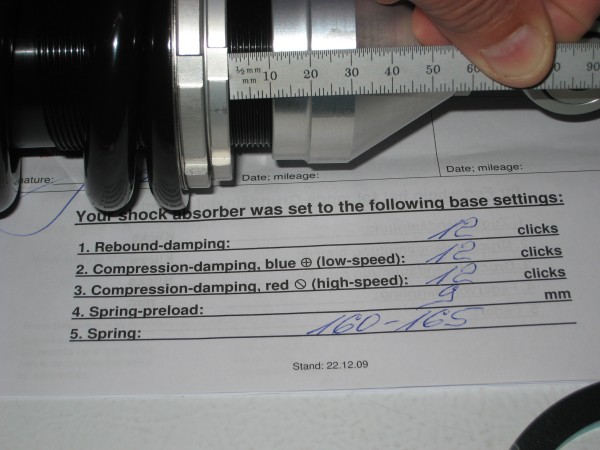
The picture earlier shows the build paperwork with the recommended 12 clicks (out of 23) on the damping adjusters. Clicks are counted starting from the maximum damping position (fully closed).
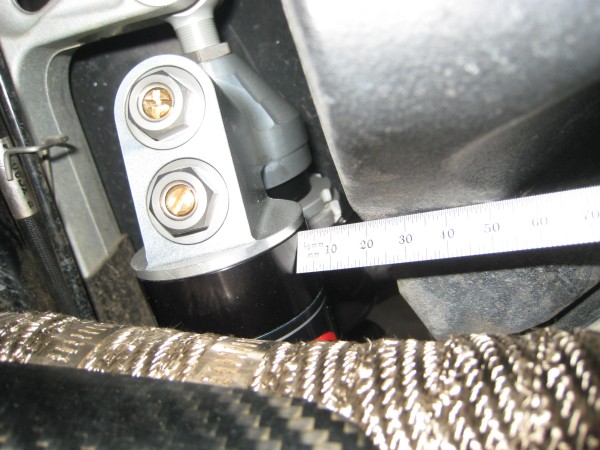
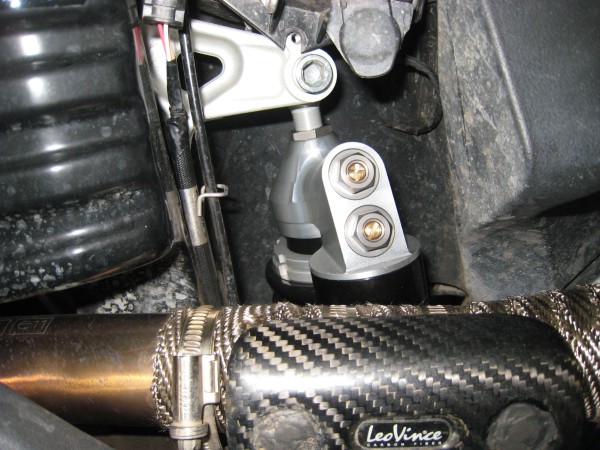
At the top of the reservoir body are the 2 compression damping adjustment screws, the top (+) one is low speed and the bottom (-) one is high speed. They should always be set within 5 of each other.
To close a screw and increase the amount of damping, turn a screw clockwise. You can see it recessing into the body:
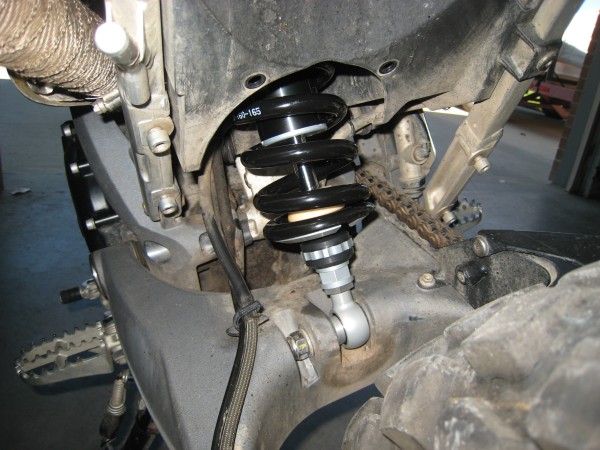
At the bottom of the shock is the rebound damping adjuster. It has a very light touch and you can easily move it with your hand. To close the adjuster and increase the amount of damping, move the adjuster clockwise, as viewed from beneath the shock (as if you were laying under the bike looking up):
Testing:
I rode the bike offroad on a section of a rocky 4WD road that has many small jumps and g-outs. I am not good at setting up damping so I went first for major damping changes.
I set the rebound to both minimum and maximum damping and could see a big difference. I set it to about 5 clicks (remember 0 is max damping).
I then adjusted the hi and lo compression to both min and max to compare and ended up with about 5 clicks also. I can't say I could tell between a few clicks, but in the end there was only 1 big jump that would bottom out the shock. VERY NICE !
If you want to read more about how to set it up, check the Internet. One place is BrucesSuspension.com and he says to set the rebound first!
Adjusting shock length:
I measured the seat height at the front near the tank. My shock came adjusted to its max length of 346 mm.
Remember this is not their standard shock but a custom one I ordered. I use a level on the seat and keep it level to measure seat height.
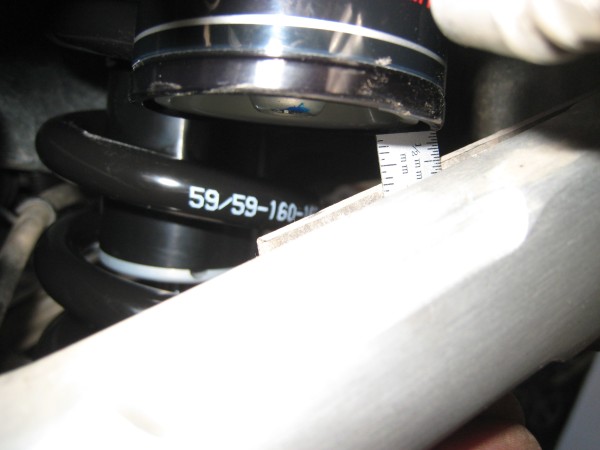
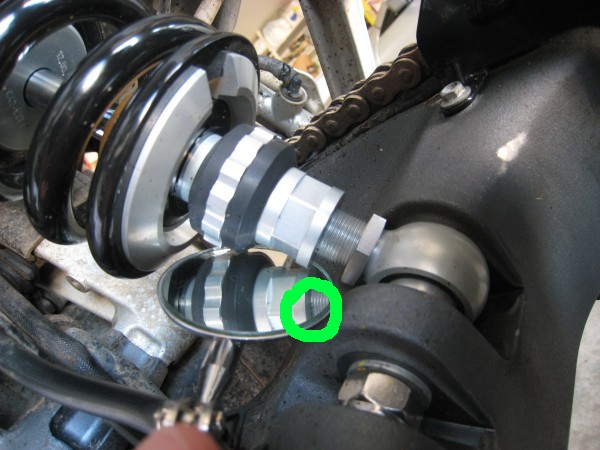
The maximum allowed safe length is marked on the threads with a shallow hole, as shown in the picture and described in the Wilbers docs.
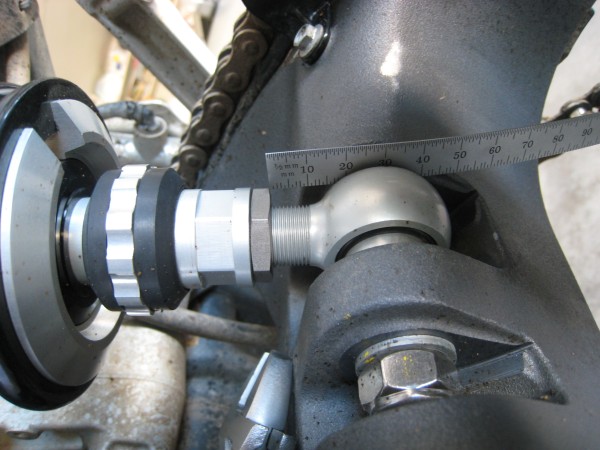
At a shock length of 346 mm, the seat height was 875 mm (34.4 in). When I adjusted the shock length shorter by 9mm to 337 mm, the seat height was 856 mm (33.7 in). In fact I was not able to get the full 10mm shorter length as it would not go further but bottomed instead at 9mm shorter.
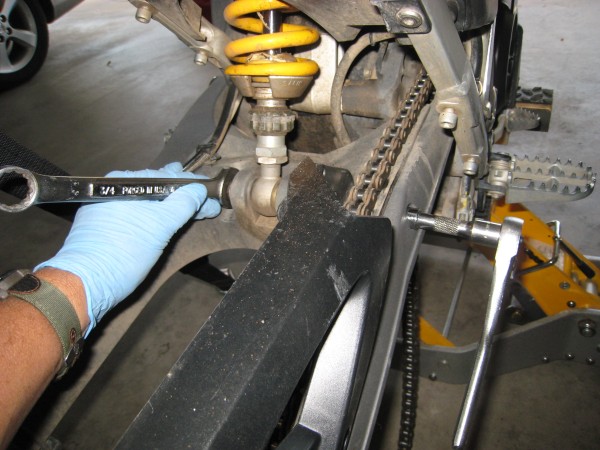
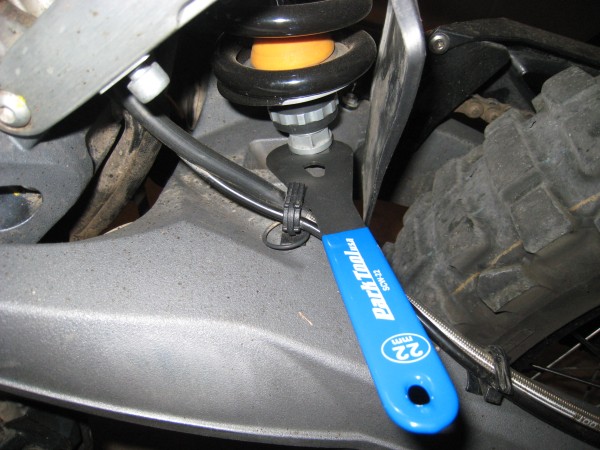
Note that to adjust the shock length, both the thin locking nut and the soft aluminum length adjuster collar take a 22mm open end wrench. However this is such a large wrench that it is too thick to fit in the length adjuster collar. I tried several brands but ended up just using an adjustable wrench.
Furthermore, as you adjust the locking nut lower, the swingarm gets in the way and even a medium thin wrench will not fit on the locking nut. My solution for this was to buy a very thin 22mm cone wrench made for bicycles by Park tools, part number SCW-22. It is safe because you just need to snug the locking nut and it's a steel nut.
Back